Back when I was an architecture student, we learned how to draw perspective traditionally. Plotting horizon lines and vanishing points seemed easy enough on a simple cube. However, things get much more complicated when you’re working with complex characters and fleshed-out scenes.
What’s more, going the manual route can take an incredible amount of time. One tiny mistake can make your whole composition feel completely off. After all, we’re only human.
In this article, I’ll show you how a 3D posing app like PoseMyArt can solve your perspective woes. By utilizing its 3D camera features, you can drastically cut down the time you spend drawing perspective grids manually.
The Struggle with Drawing Perspective Grids Manually
I truly admire artists who’ve mastered traditional perspective methods. But when you’re new to those methods, or just don’t have a great handle on how they work, it’s incredibly easy to misplace your vanishing points and horizon lines.
When that happens, your final drawings end up looking warped or distorted. Even worse, trying to accurately draw foreshortened anatomy, like a fist or a foot thrust toward the viewer, can quickly turn into a frustrating guessing game.
((IMAGE: complicated perspective grid with distorted character/s))
Placing and plotting all those lines isn’t the best strategy when you’re on a tight deadline, either. Instead of enjoying your creative time designing a character or bringing a scene to life, you end up spending hours fighting with a ruler.
While a grid on your paper can help, it can also make you feel trapped. Relying too heavily on strict lines can hold you back from trying out dynamic angles, leaving your final artwork feeling stiff and rigid.
If you need more help with dynamic posing, you can also check out these articles:
- Stop Drawing Statues: A Guide to Mastering Dynamic Poses
- Drawing Dynamic Anime Characters: How 3D Anime Model References Improve Poses and Motion
Enter PoseMyArt: Your Virtual Camera Crew
Here’s where PoseMyArt comes in. Aside from being a versatile 3D model poser web application, it holds the ultimate key to solving your perspective issues through its intuitive 3D camera features.
PoseMyArt’s camera allows you to easily shift your view across a 3D digital canvas. The app automatically calculates the perfect perspective, scale, and tricky foreshortening for you in real-time.
Depending on the vibe you want for your artwork, you can instantly switch from a dramatic worm’s-eye view to a sweeping bird’s-eye view. You can zoom in close for an intimate portrait or pan out for the bigger picture. All you need to do is click and drag or scroll.
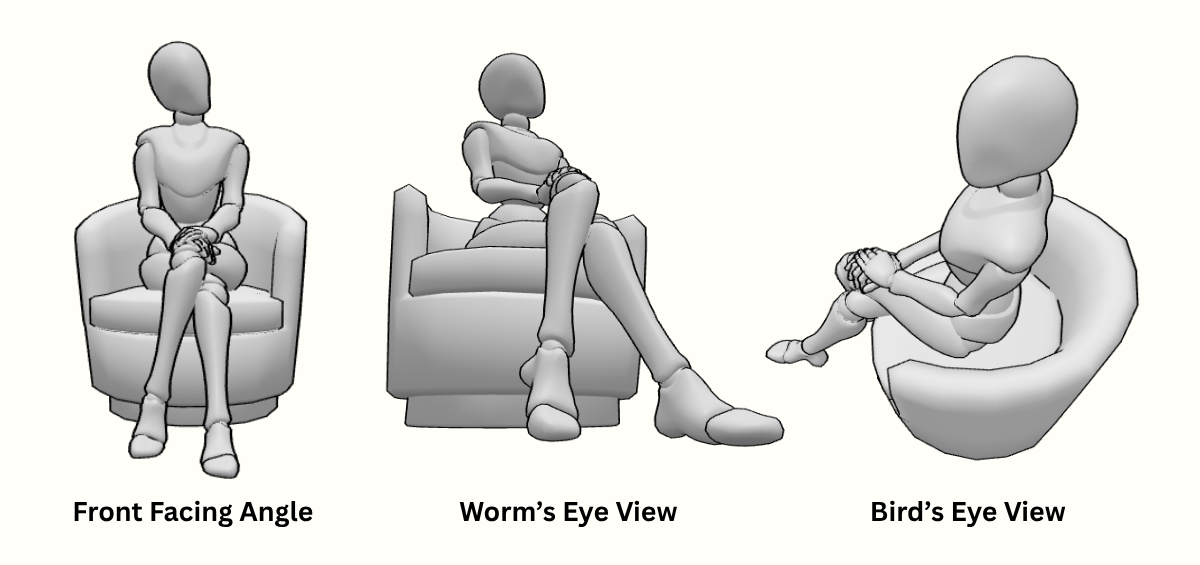
Directing Your Camera View
To manipulate your camera position, it’s best to just try it out on the app itself. But here are a few basics to keep in mind if you’re having a hard time figuring it out.
Rotating your Canvas - Clicking, holding and dragging with left your mouse button Panning Around - Hold down Shift + click and drag with your left mouse button Zooming in and Out - Scrolling with your mouse wheel/ press down your mouse wheel and move your cursor vertically up and down to adjust
Don’t forget about your Field of View Slider, which you can find among your camera tools when you click the camera icon on the upper left of the PoseMyArt app window. A higher FOV makes for a more dramatic shot. Test it out.
Step-by-Step: Getting Perfect Perspective Reference Shots
Here’s a simple workflow you can use to set up flawless perspective references for your base sketches:
Step 1: Block Out the Environment
Build your setting using 3D props like furniture or basic geometric shapes if you can’t find a specific prop in the library. The goal here is simply to “block out” the main elements and background objects so you have an idea of where everything goes.
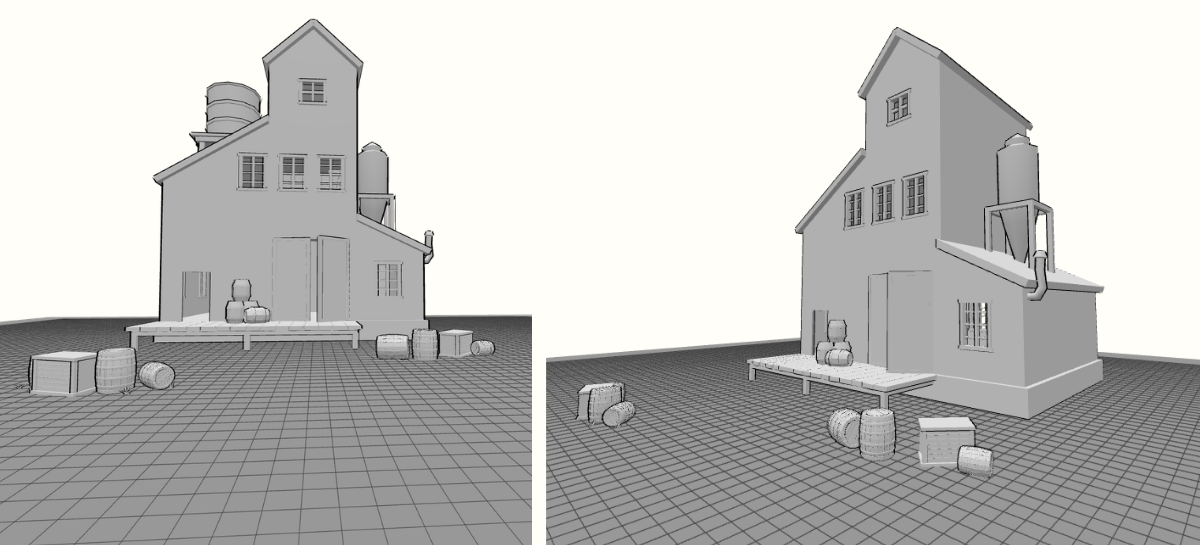
Here, I tried out blocking a scene with a few barrels, boxes, some grass, and the alcohol factory building prop. You don’t need all the specifics. Just enough to give you some points of reference. Some of these are from pre-made scenes.
Step 2: Position Your Characters
Complete the setup by dropping in realistic, anime, or blocky 3D models. Take advantage of PoseMyArt’s pre-made poses or full scenes to save yourself time.
Let’s set it up.
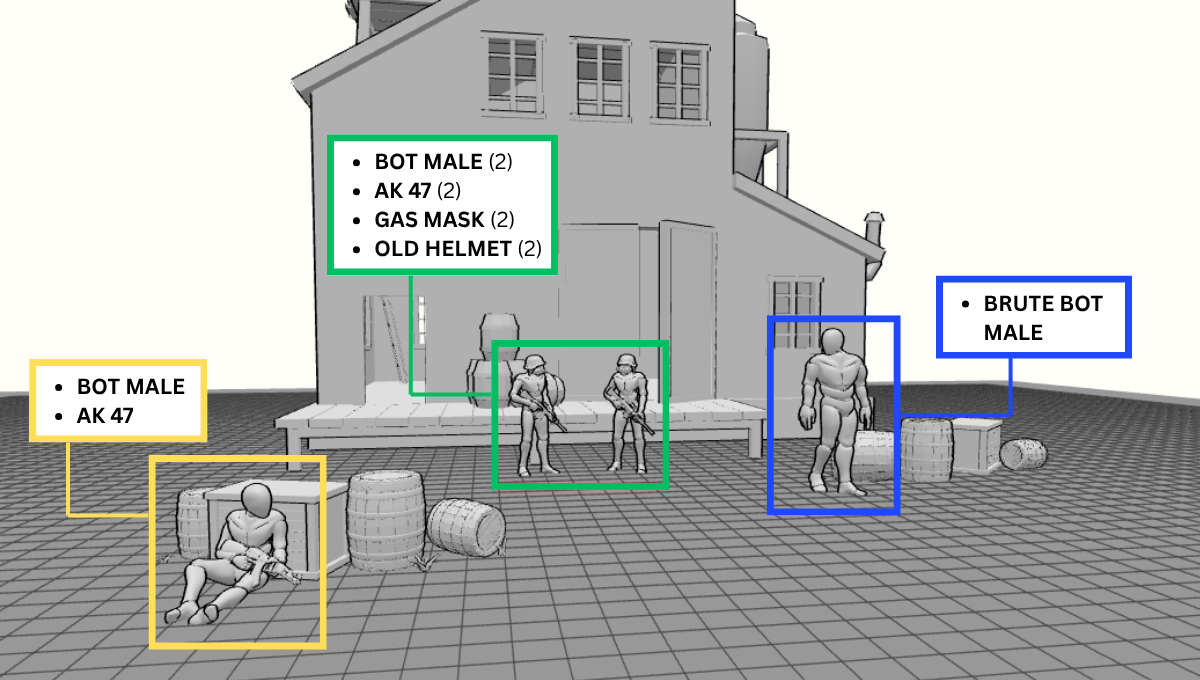
I used three bot male models kitted out with AK 47s and old helmets as props to flesh out their characters a bit. I also added an additional brute bot male model. Never be afraid to mix different types of models to set a scene.
Step 3: Find the Perfect Angle
Fly the camera into position. Rotate, zoom, and adjust the camera angle until your reference looks just right. Take advantage of the Field of View (FOV) Slider under the camera features.
Cranking it up creates an intense, dynamic wide-angle effect, while lowering it flattens the view for a classic portrait look. Don’t forget handy tools like Reset Camera and Save Camera Position to keep track of your favorite angles.
One scene setup in the PoseMyArt app can be used multiple times from different angles.
A pair of guards chat close to the alcohol factory’s entrance. A brute male patrols the area and looks toward a fourth character. An enemy scout hides behind a few boxes and barrels, trying to avoid being spotted.
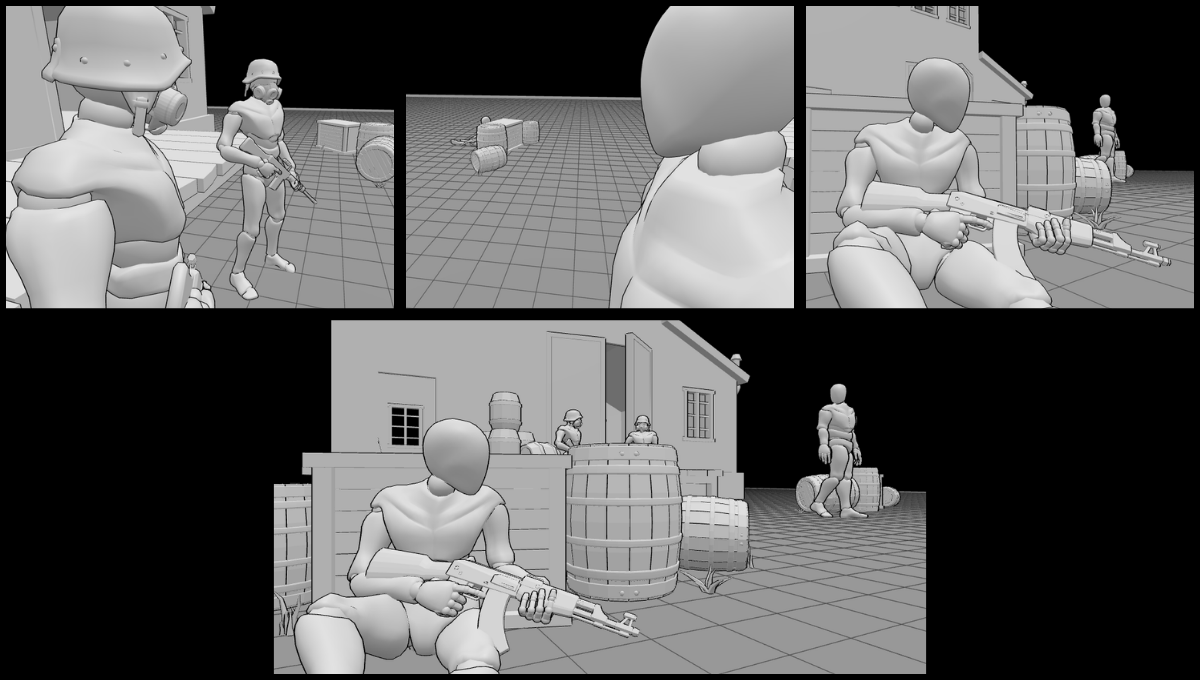
Step 4: Lock It in and Export or Grab Screenshots
Take a screenshot or export a 2D image with a transparent background to use as a digital drawing layer. You can also export the scene as an OBJ file for other 3D software, or save the file to reload and tweak later.
Since our sample scene involved the placement and arrangement of several models and props, I did save the file to my computer so that it would be easy for me to go back to when I had to take a break from editing.
Final Thoughts
Instead of letting traditional perspective methods eat into your actual drawing time, let technology handle the heavy lifting.
Using digital tools to map out your composition isn’t cheating. It’s a smart way to streamline your workflow. It allows you to skip the tedious grid setup and jump straight into the fun part of creating.
Head over to PoseMyArt, build your next 3D setting, and capture the perfect reference shot so you can focus on what you do best: making beautiful art.
If you want to read more on 3D perspective, you can check out this article: 3D Perspective Drawing: Why Guessing Angles Always Fails.