How to Align Multiple Characters in One Scene? Perspective Tips for Group Art
As an artist, you may decide to go beyond drawing single-character pieces and start incorporating more characters into one frame, and even building scenes. Now, this can become trickier when your characters aren’t the same distance away from your camera.
You’ve probably seen art or worked on your own pieces that seem to look off when you inspect it. A character or an element may actually be sinking into the floor or floating. Character sizes and heights are a bit difficult to keep consistent through changing camera angles and distances.
When you’re managing the massive puzzle that is multi-character composition, the challenge is keeping heights consistent and feet firmly on the ground.
The Nightmare of the “Lineup Trap” and Floating Feet
When we draw groups, our brains naturally tend to line everyone up side by side at the exact same camera distance. This is called the “lineup trap,” and it instantly makes your scene look stiff and flat. If you try to guess the perspective, you will inevitably end up with one character looking like a giant, or another one looking like they are floating above the ground.
Even with years of experience, manually comparing character heights or drawing groups in perspective can lead to hours of redrawing. That is where a digital 3D workspace like PoseMyArt comes in handy. It takes the exhausting technical guesswork out of your layout so you can get back to the fun part of drawing.
Step 1: Lock Down Your Ground Plane
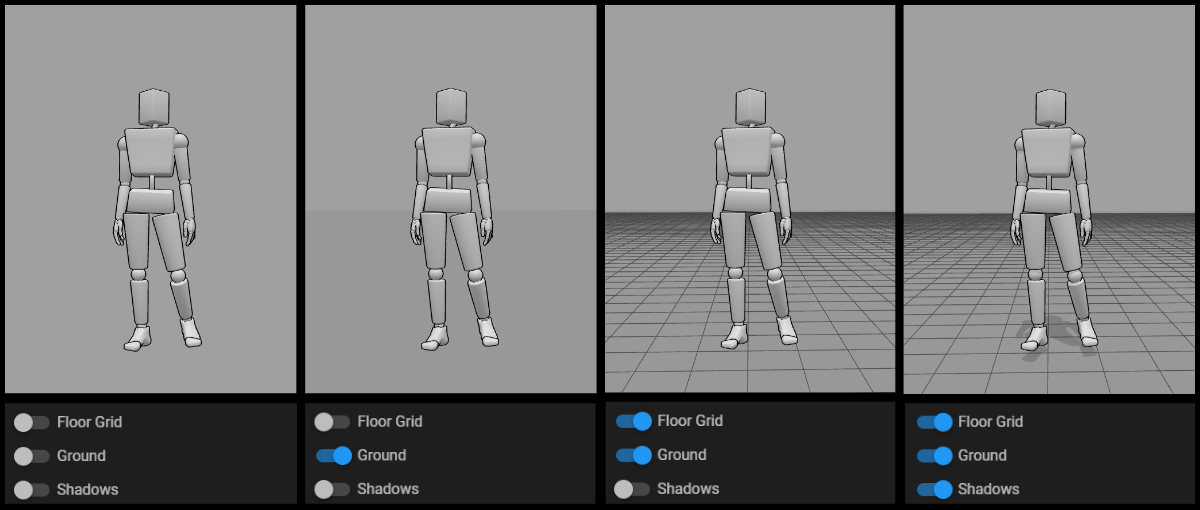
To keep your characters from looking like they’re floating, you need to establish a solid “ground plane.” In the PoseMyArt app, you can easily toggle on the Floor Grid and Ground features by clicking the gear icon in the Settings menu on the upper right side of the PoseMyArt app screen. This instantly gives you a 3D perspective floor grid that acts as your spatial guide.
Once your grid is active, you can use the Move tool (by pressing ‘G’ as a shortcut) to slide your characters around the workspace. Be sure to drag your models along the Z-axis (depth) and check that their feet are firmly planted on the floor grid.
This simple step ensures that all your characters are standing on the exact same physical level, no matter how deep the perspective gets.
Compare these next images. They’re samples of what you might see on your screen on the PoseMyArt app when you toggle through the different settings.
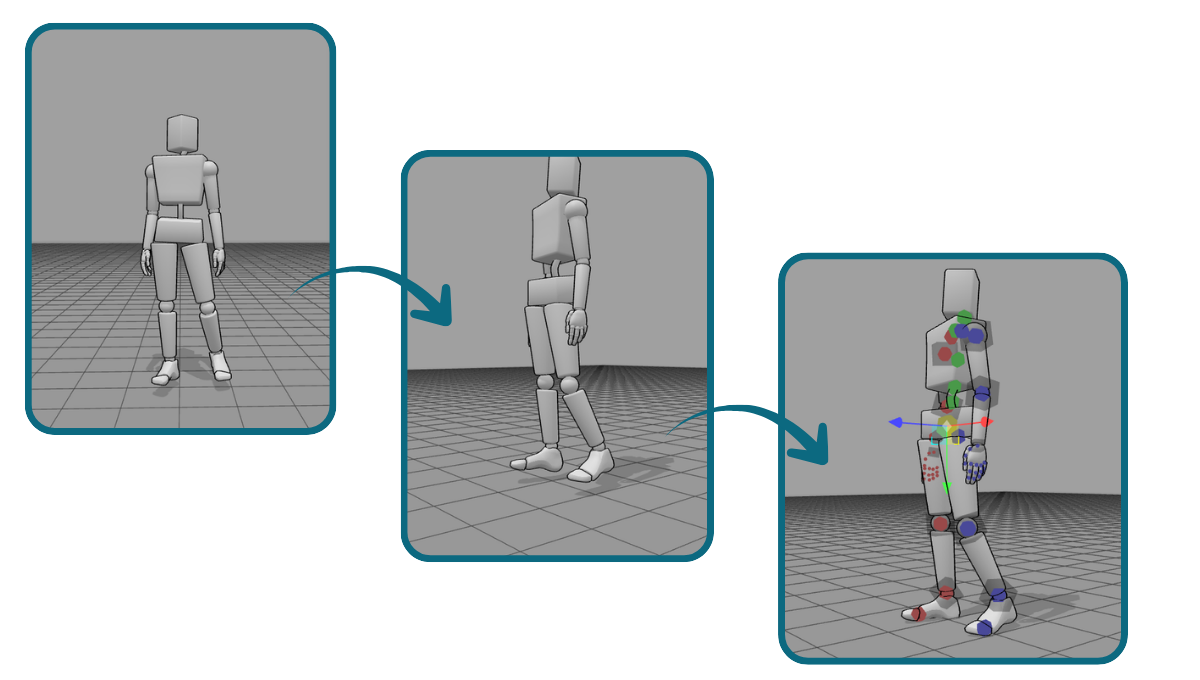
Even when a model looks like it’s standing on the ground, you can change the camera angle and zoom in to double check. In this example, the model is actually floating a little off the ground.
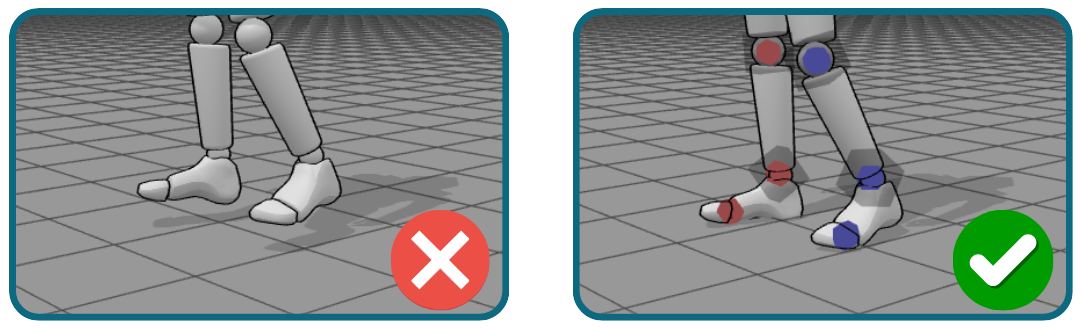
Let’s try zooming in and comparing. Note that when a model’s feet are actually touching the ground plane, the shadows will visually connect to the model’s feet.
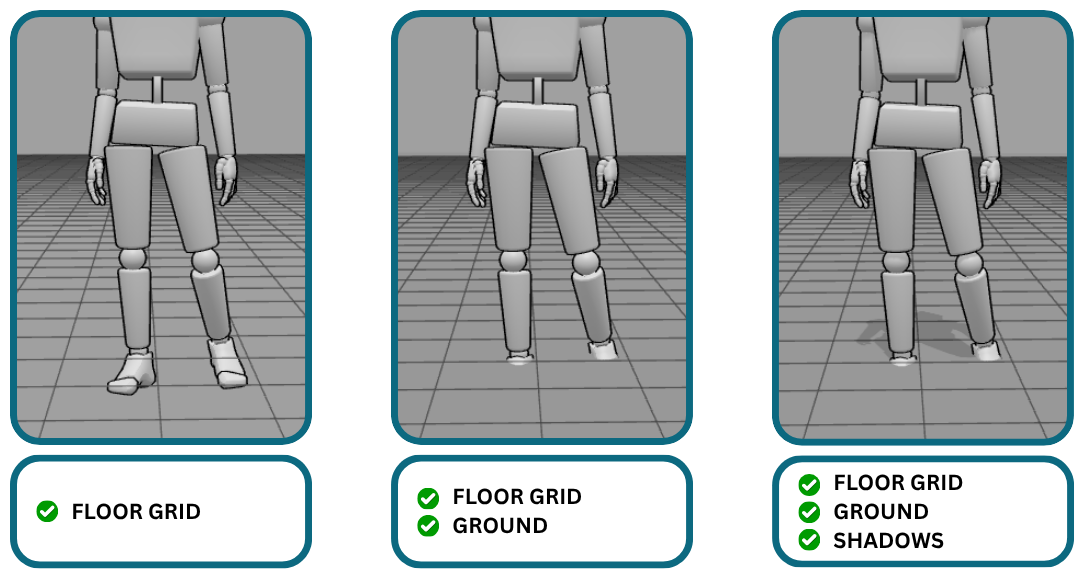
If you drag your model too far down and through the ground plane, this is what it might look like. It may not be immediately be visible if the ground and shadows settings aren’t activated. Adjust your model’s placing as needed.
Step 2: Master Character Height Comparison with Scale and Diverse Models
Another common headache is maintaining consistent heights between characters of different sizes. For example, if you have a taller female model and a shorter male model, manually guessing how they scale next to each other as they step back in perspective is incredibly difficult.
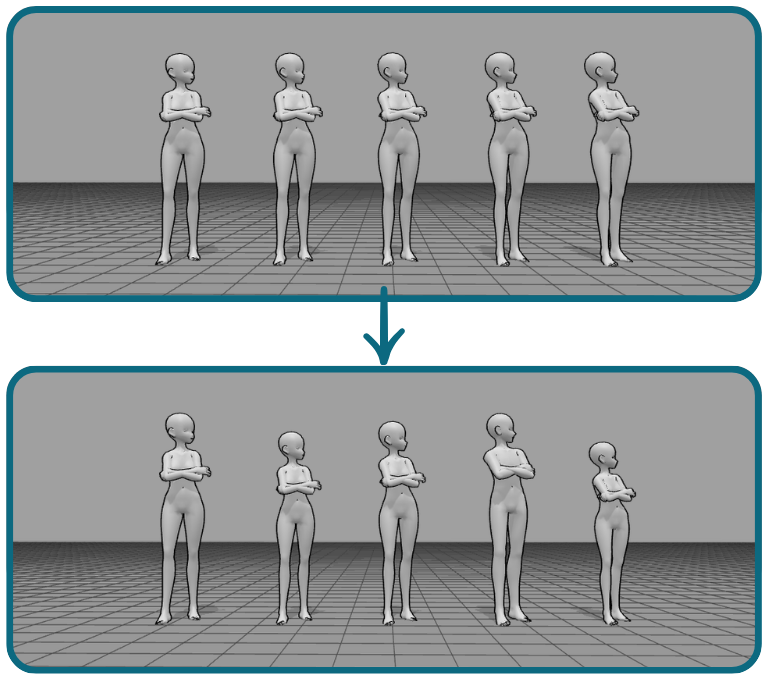
This is where the lineup layout can be useful. You can create your models and place them side by side to ensure you have the proper heights down before moving the models around the workspace.
Scale
To speed things up, you can also use the Scale tool (by pressing ‘S’ as a shortcut) to easily scale models. Be sure to click and drag the light grey boxes to scale the model as a whole.
This example uses the same model, Anime Basic Female, and compare the same sized model to a different lineup with different heights.
Model Types
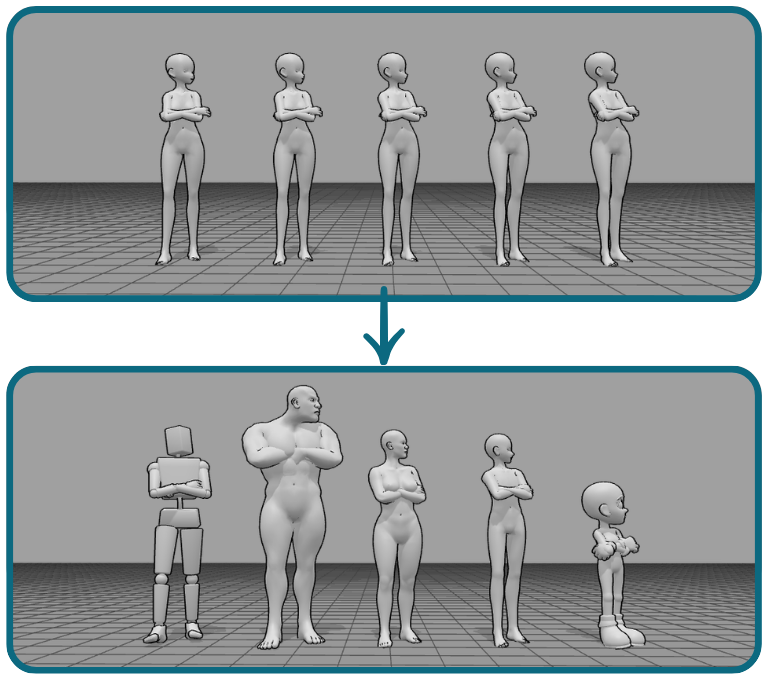
Don’t forget, PoseMyArt also has a variety of different models that you can use for different characters. Remember, these models are for your reference, so they don’t need to be exactly your character’s body type or size.
Color
Use the Color setting, which is in your model toolbar, to change the color of your model. Use different colors to tell characters apart, especially if your characters use the same model or have the same size.
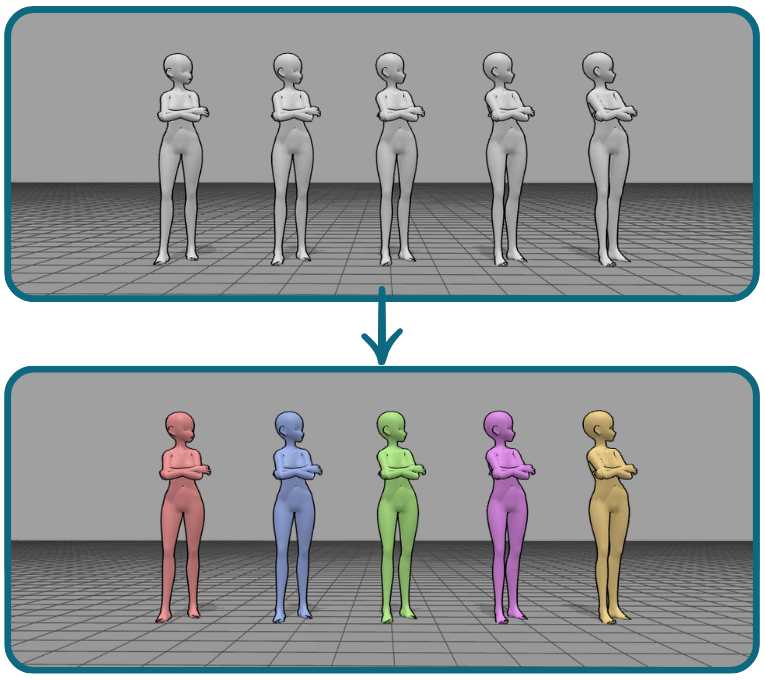
This can come in super handy once your characters mix up the lineup order and come together in one group pose.
Save & Load Pose
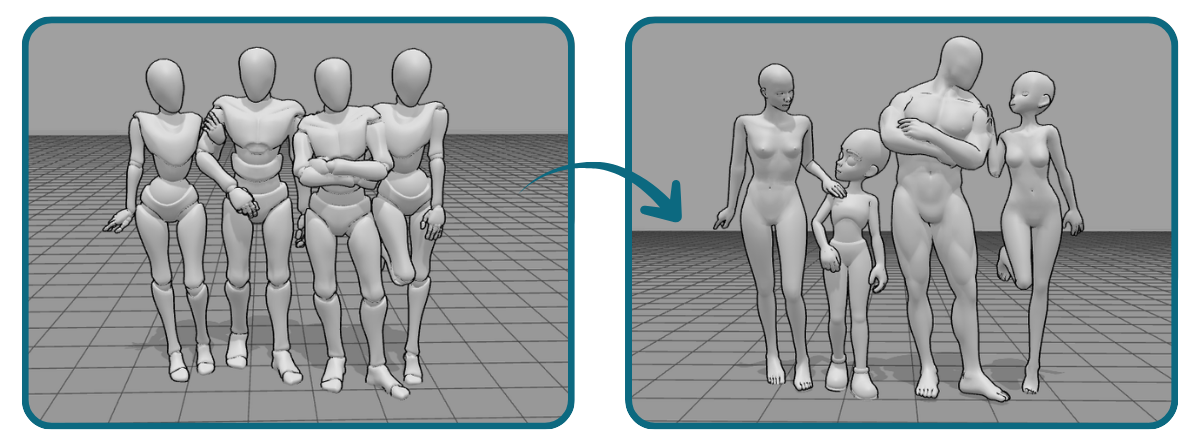
One of my favorite tools to keep heights consistent is using the Save & Load Pose tool. This tool allows you to copy a pose from an existing model on your workspace, and paste the pose onto different model.
First, tweak your models’ heights individually using the Scale tool. Then, load a pre-made scene, copy the poses, and paste them directly onto your custom-scaled figures.
Because of the height differences, the copied poses might look a bit “off” at first. However, just tweaking the limbs is much faster than starting from scratch. It takes the grind out of your posing phase so you can jump straight into sketching!
Here’s one example. When I copied and pasted the poses onto my characters, I made a few tweaks to adjust the poses to better fit body types and height differences.
Step 3: Arrange Your Multi-Character Composition in Perspective
Use Distance Variation and Overlapping
To break free from flat lineups, layer your characters in depth. Place some characters closer to the camera and others further back along the Z-axis. Distance can help tell a story.
Let’s use the same premade scene, where all the characters are practically the same distance from the camera, versus one that varies the distances.
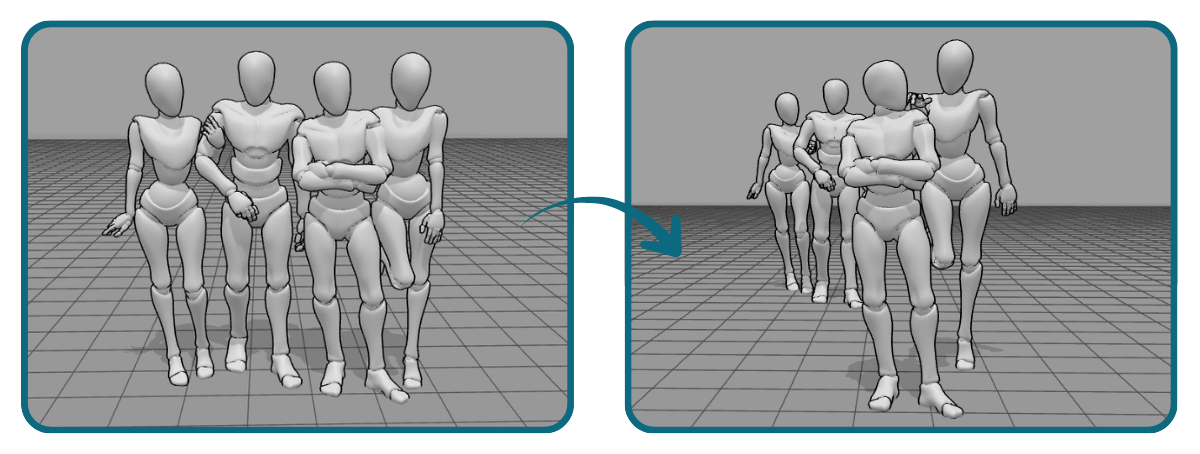
Again, distances can help tell a story. The lineup can portray a group posing for a photo. The scene with varying distances can show a character waiting while his friends catch up to him. Distance can also bring focus to a character, in this case, the one nearest to the camera.
Ground Characters with 3D Props
To further ground your models, populate your scene with 3D props such as benches, chairs, or other furniture from the app’s props library.
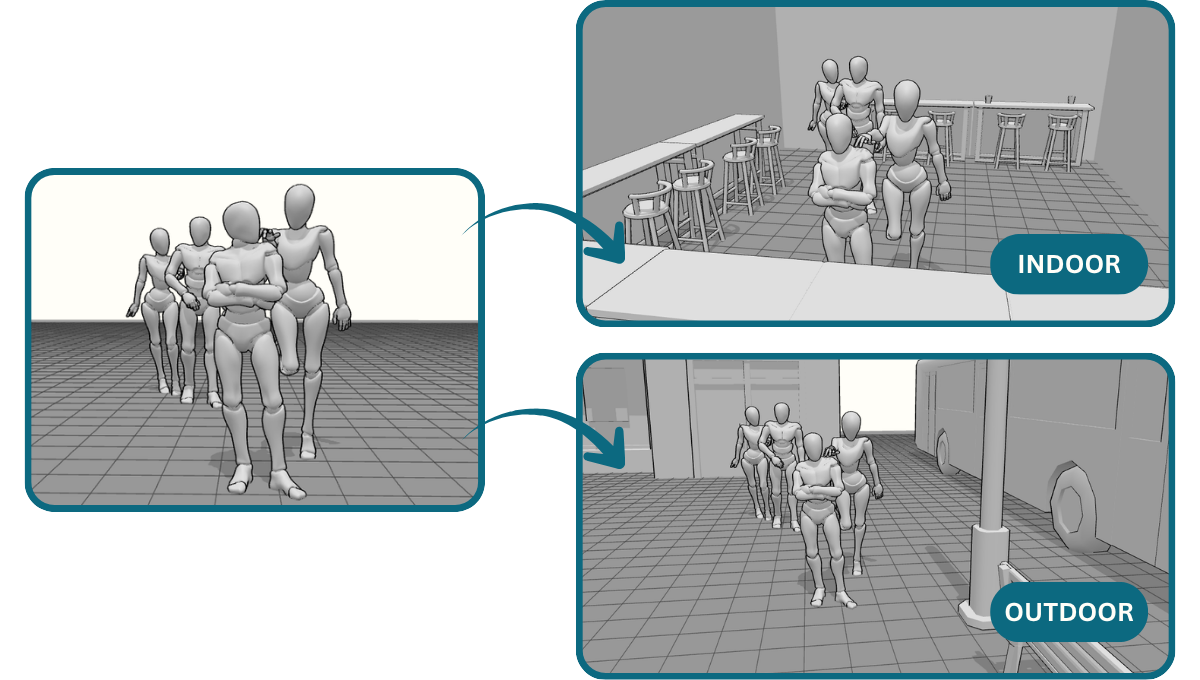
These props serve as essential spatial anchors, giving your characters physical objects to lean on or interact with. This prevents your characters from looking like they are “leaning on thin air” and keeps them perfectly scaled in the environment.
Here is the exact same layout of models, but with different props. Your prop choice can change the setting entirely.
Adjust the FOV Slider to Add Drama
Finally, don’t forget the magic of perspective camera tools. Use the Field of View (FOV) slider in the camera menu to compress the scene (lower FOV) for stylized group portraits, or widen it (higher FOV) to add intense, dramatic depth to action shots.
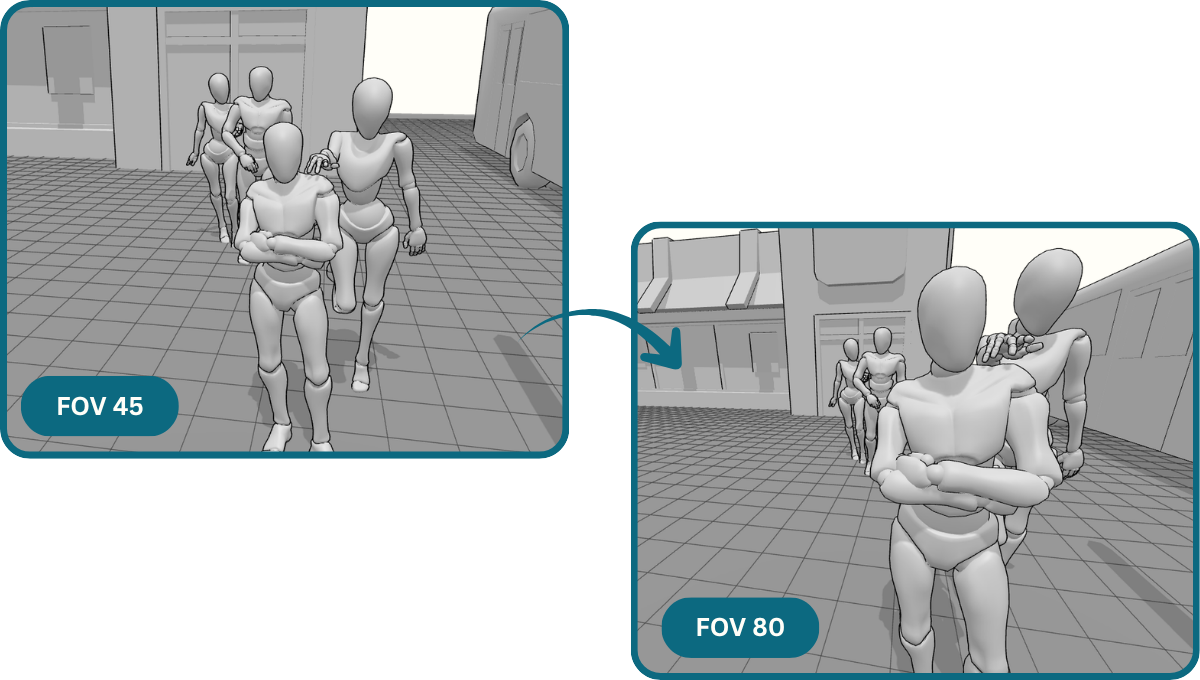
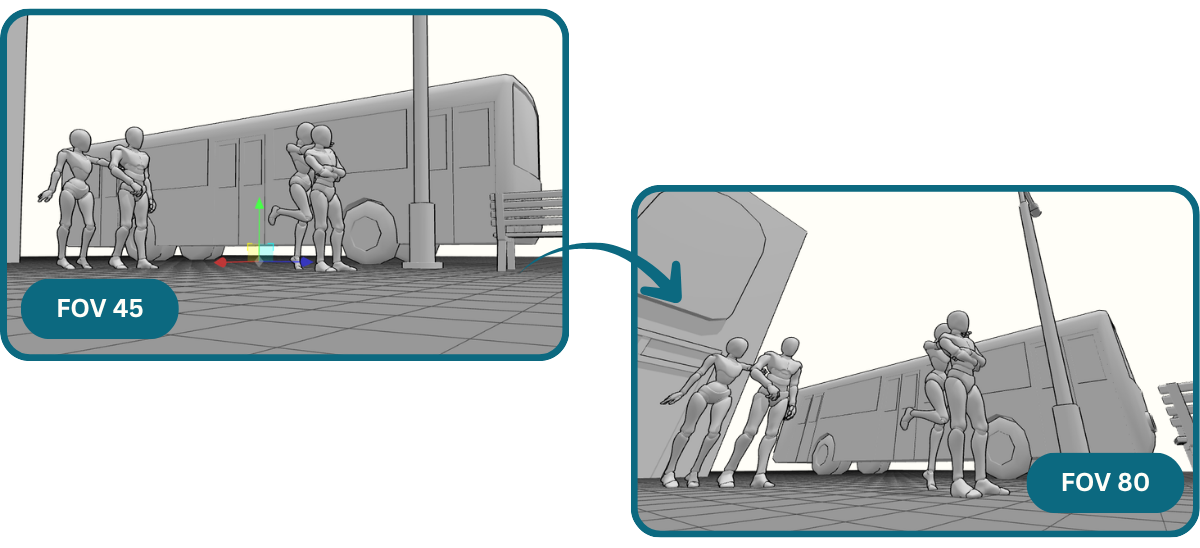 This creates an immersive experience that traditional, static 2D reference photos simply cannot match.
Final Thoughts: Take the Challenge!
Drawing groups and building scenes to create a perspective-accurate shot doesn’t need to be a struggle. By using 3D references that you can get from PoseMyArt, you can easily bridge the gap between your imagination and the canvas.
It takes the technical headache out of scale and perspective so you can focus on the fun of sketching out your art confidently and bringing it to life.
Why not head over to the PoseMyArt app today and try setting up a three-person scene using a pre-made scene as your blueprint? Play with character heights, check your floor grid, and see how much faster your drawings come together.
Happy posing, and keep creating amazing things!
If you want to learn more about how to pose multiple characters in a scene, try checking out another article: Mastering Group Composition Using PoseMyArt 3D Models.