Dynamic Archer Poses for Fantasy and Historical Characters
One of the things I enjoy most about drawing archers is that they can tell a story long before the arrow is released. A single pose can reveal confidence, hesitation, patience or determination without relying on facial expressions or dialogue. Whether you’re illustrating a fantasy elf, a medieval hunter, or a historical warrior, the way they hold the bow and position their body has a huge impact on how believable the scene feels.
The challenge is that archery isn’t just about pointing a bow at a target. Every stage of the shot - from raising the bow to drawing the string and following through after the release - changes the body’s balance, muscle tension, and silhouette. Small adjustments in the shoulders, hips, or feet can completely change how natural the pose looks. In this guide, I’ll share practical tips for creating dynamic archer poses, avoiding common mistakes, and using 3D references to explore angles and body mechanics that are difficult to visualize from imagination alone.
Start With the Body, Not the Bow
One mistake I see quite often is treating the bow as the most important part of the pose. It’s easy to focus on getting the weapon looking right while the character underneath becomes stiff or unbalanced. In reality, the bow only works because the entire body supports the movement.
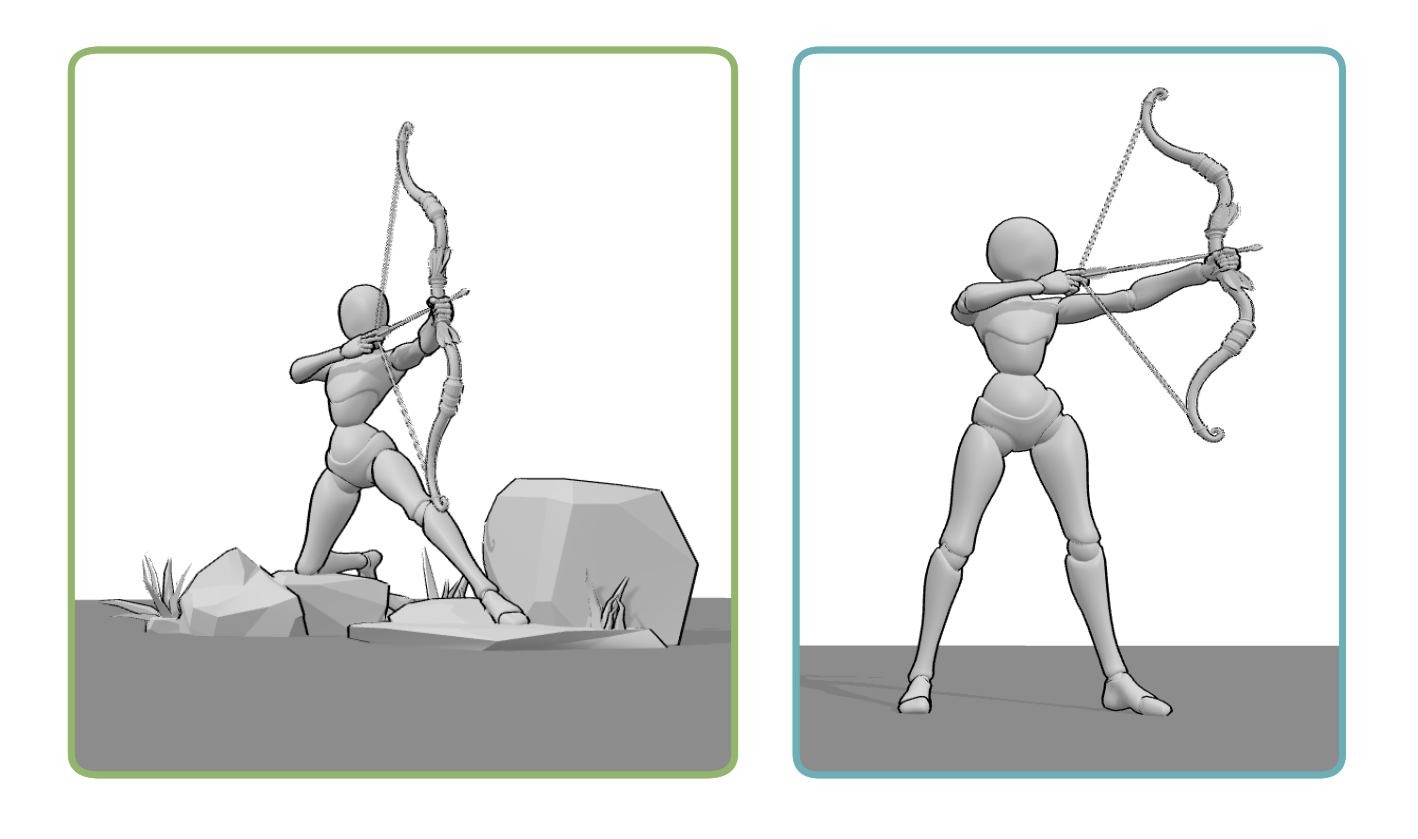
Before adding any equipment, I like to think about the character’s balance. Which foot is carrying most of the weight? Are they standing firmly on level ground or adjusting their stance on uneven terrain? Is the torso twisting naturally toward the target, or are the shoulders doing all the work? Answering these questions first usually leads to much stronger poses.
Once the body’s foundation feels solid, the bow naturally falls into place. Instead of looking like a separate object attached to the character, it becomes part of the action. This also makes it much easier to experiment with different bow sizes, camera angles or character designs without losing the pose’s sense of realism.
Every Stage of the Shot Creates a Different Pose
One of the reasons archery is so interesting to draw is that there isn’t just one “archer pose.” Every stage of shooting an arrow has its own body mechanics, balance, and sense of movement.
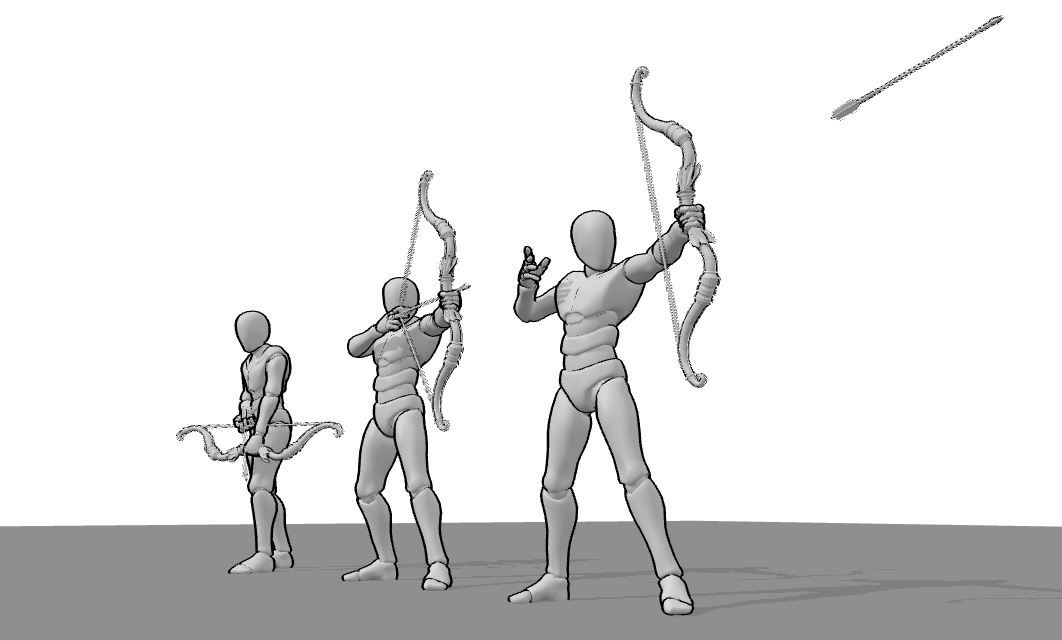
A character reaching for an arrow feels calm and deliberate. Raising the bow shifts the shoulders and changes the line of the spine. Drawing the string creates visible tension across the back, arms, and chest, while the moment just before release often becomes the most dramatic part of the sequence. After the arrow is released, the body doesn’t instantly freeze - it naturally follows through as the force of the shot carries the movement forward.
Instead of always drawing the character at full draw, try exploring every stage of the action. Showing someone preparing to shoot, lowering the bow after a successful hit, or quickly reaching for another arrow can make a series of illustrations feel much more varied. These quieter moments often tell just as much of the story as the shot itself.
If you’re looking for inspiration, browsing a variety of Bow Poses is a great way to study every stage of the movement instead of focusing only on the moment before the arrow is released.
Don’t Judge the Pose From the Front
One thing I constantly catch myself doing is checking an archer pose only from the front. It often looks perfectly fine - until I rotate it.
That’s because archery is a surprisingly three-dimensional action. The drawing elbow usually moves much farther behind the body than we imagine, the bow arm reaches toward the target, and the chest rotates instead of staying perfectly square. From the front, these depth changes are compressed, making it difficult to spot awkward proportions or stiff shoulders.
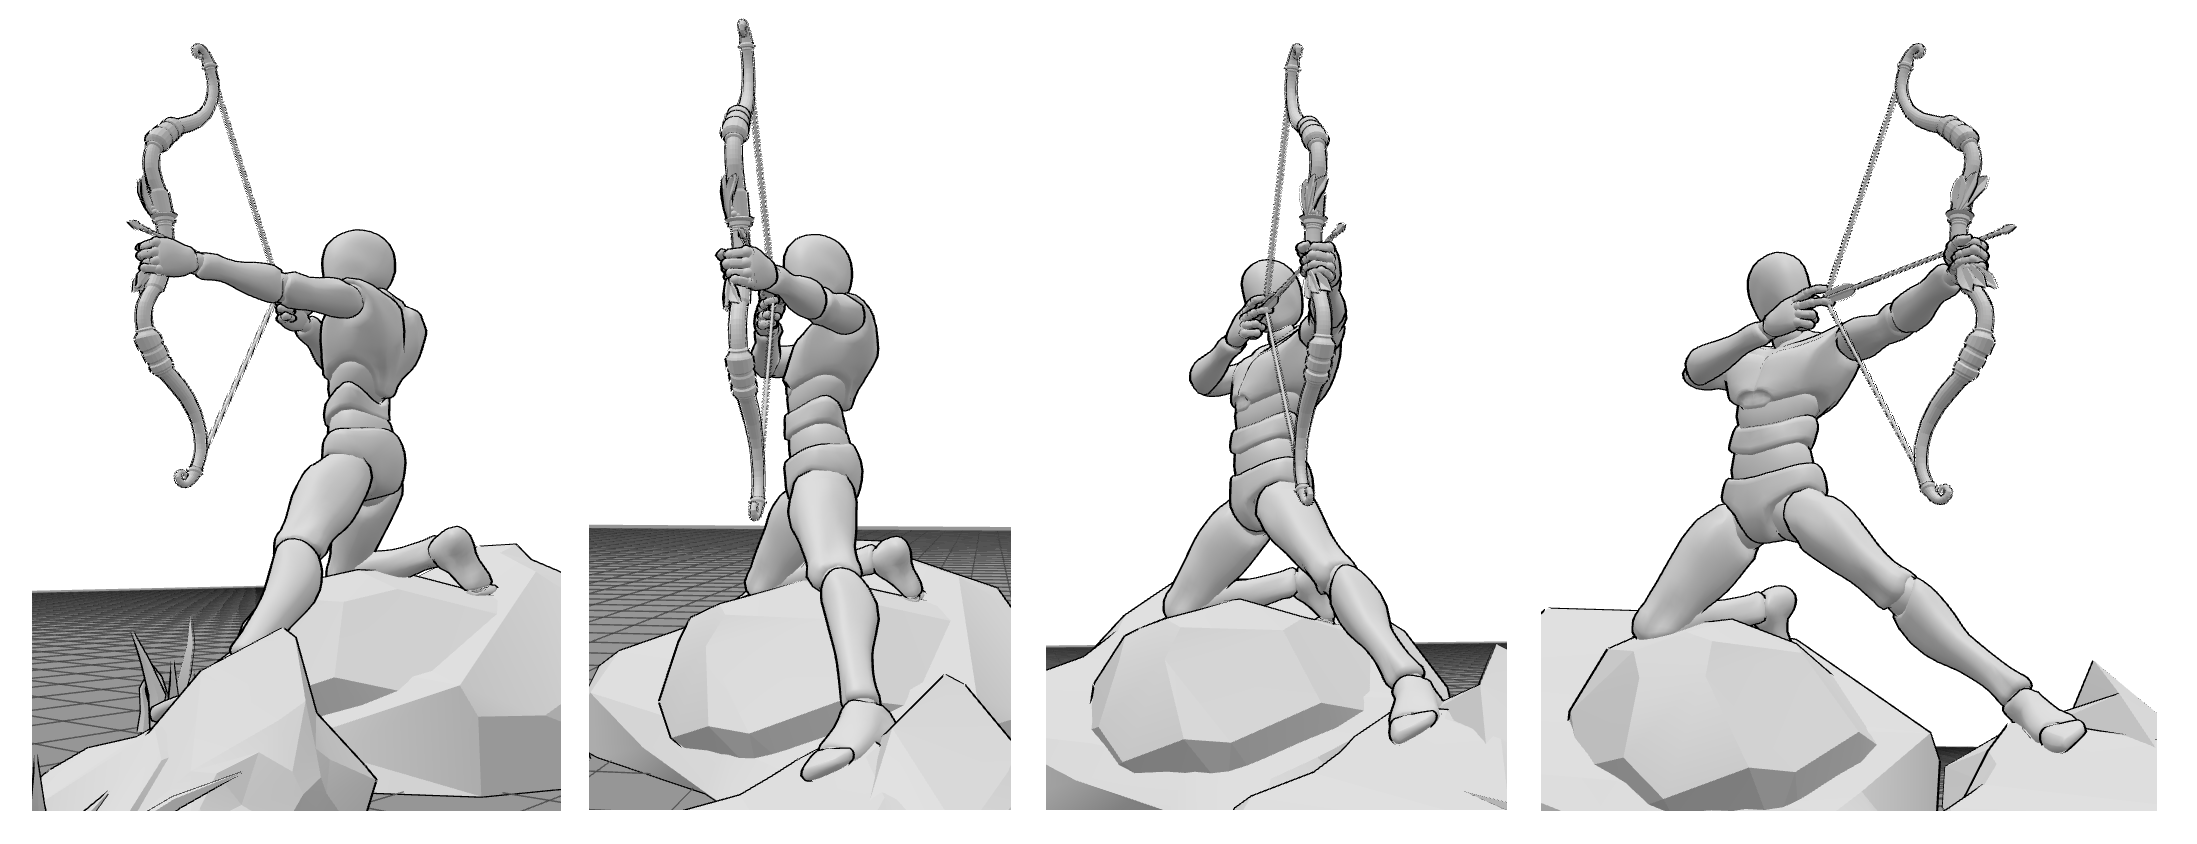
Whenever a pose feels “almost right” but something still bothers me, I rotate the camera. Looking from a side or three-quarter angle immediately reveals problems that were almost invisible before. Sometimes the drawing arm isn’t pulled back far enough. Other times the bow arm is so straight that it feels locked instead of supported. Even a small adjustment to the shoulder line or ribcage rotation can make the pose feel much more convincing.
This is one of the biggest reasons I like working with 3D references. Being able to check the same pose from multiple angles helps me understand how the body actually twists while drawing a bow, instead of relying on what I think it should look like.
Studying the same action from multiple viewpoints is much easier when you have a collection of Archer Poses to rotate and compare from different camera angles.
A Good Archer Pose Starts With a Good Grip
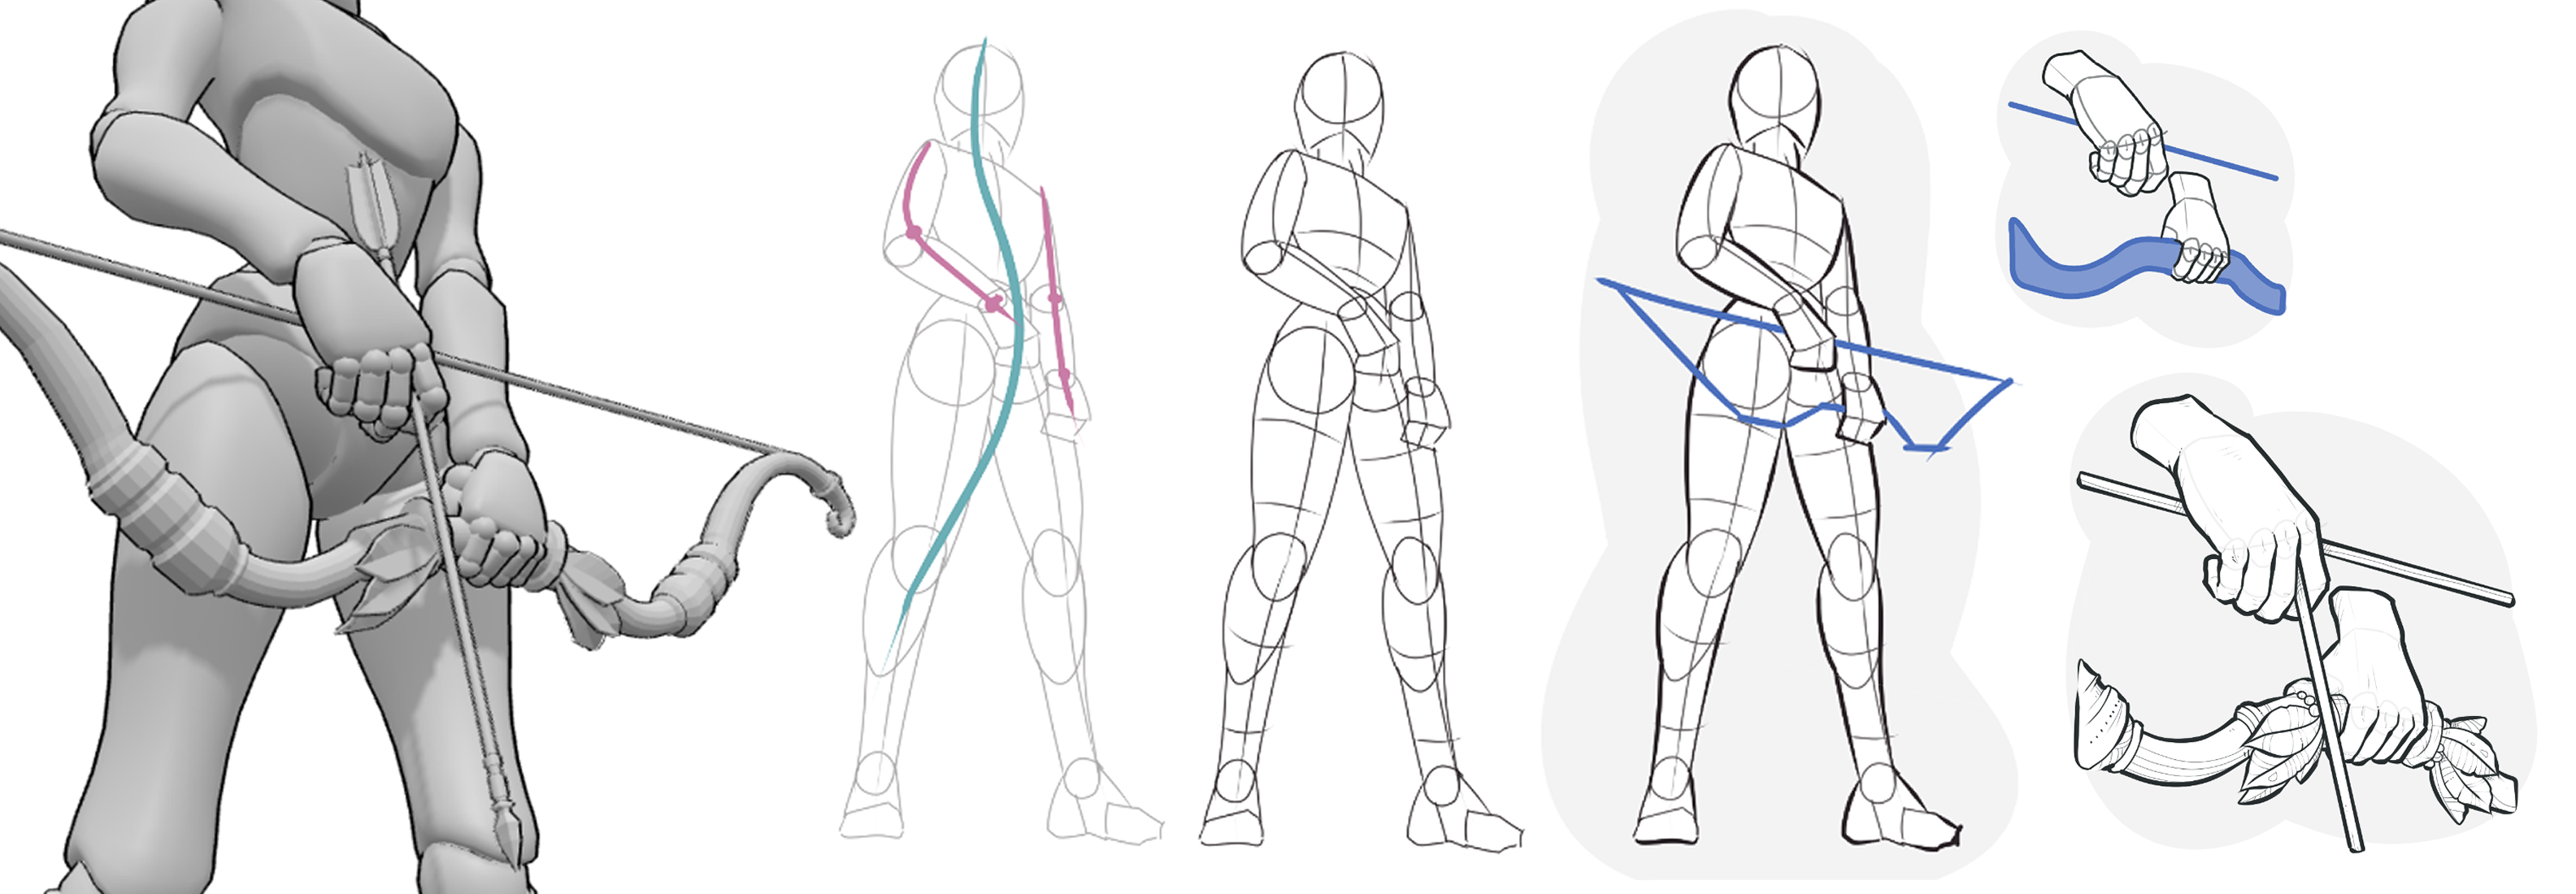
Before worrying about body mechanics, make sure the character is holding the bow naturally. An awkward grip can make even a well-balanced pose feel unconvincing. If you’d like to see how I approach a simple bow holding pose from the first sketch, I’ve included a step-by-step walkthrough in my Weapon Holding Poses Guide. It’s a quick exercise, but it shows how the grip, hand placement, and the bow itself come together before you start building a more dynamic archery pose.
What a Natural Bow Aiming Pose Looks Like
When an archer reaches full draw, almost every part of the body has a specific job. Understanding what each body part is doing makes it much easier to spot mistakes while drawing.
Rather than thinking about individual limbs, imagine the body as one connected system transferring force from the ground into the bow.
- Feet: A stable stance roughly shoulder-width apart gives the body a solid base. One foot may be slightly forward depending on the character and shooting style.
- Hips: The hips stay stable instead of twisting dramatically. Most of the rotation happens higher in the torso.
- Torso: The chest rotates toward the target while remaining upright. Avoid excessive leaning unless the terrain requires it.
- Shoulders: The bow-side shoulder stays low and supported rather than lifted toward the ear. The shoulders form a strong line instead of collapsing inward.
- Bow arm: It extends naturally toward the target without locking the elbow completely straight.
- Drawing arm: The elbow travels behind the body, roughly following the line of the arrow instead of pointing downward.
- Head: The head turns toward the target while remaining relaxed. The eyes follow the arrow rather than the bow itself.
- Bow angle: For distant targets, the bow is often raised slightly higher to compensate for the arrow’s drop, while close-range shots usually require little or no upward adjustment.
If several of these points feel wrong at once, don’t try fixing only the arms. Start from the feet and hips, then work upward. Small improvements near the body’s center usually solve multiple problems at the same time.
Draw the Target, Even If You Never Show It
One habit that completely changed the way I draw archers is deciding where the arrow is going before I start refining the pose.
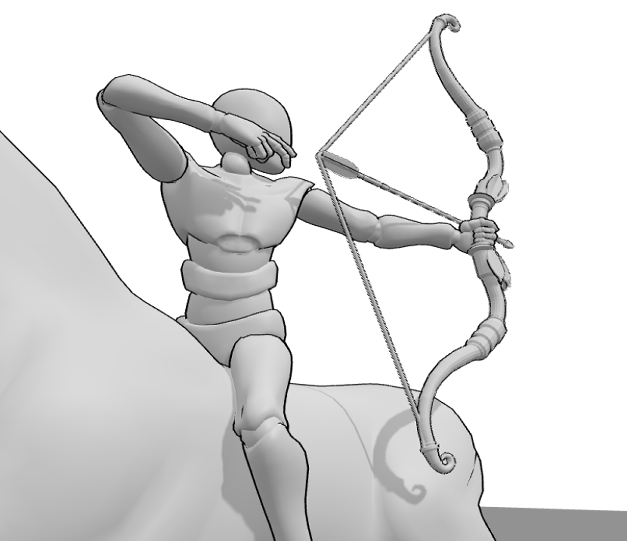
Even if the target never appears in the final illustration, I always imagine exactly where it is. Sometimes I even place a temporary marker or object in my 3D scene just to give the character something real to aim at. It immediately makes the pose feel more focused.
For this example, I’ve used a pumpkin as a temporary target. Any object would work - the important part is giving the archer something specific to aim at. The pumpkin isn’t part of the final composition; it’s simply brave enough to stand where the arrow is supposed to go. Think of it as a visual placeholder that can disappear once the pose feels right.
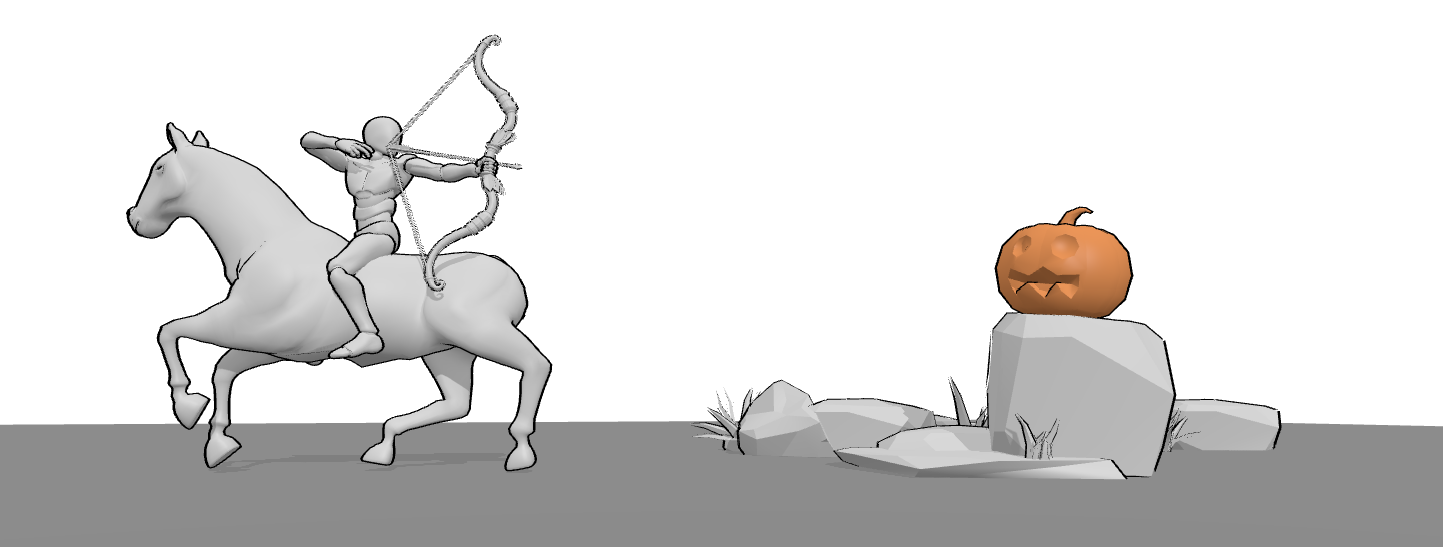
Once the target has a clear position, everything else starts to make sense. The head turns toward it. The shoulders, torso, and bow align with the same intention instead of each pointing in a slightly different direction.
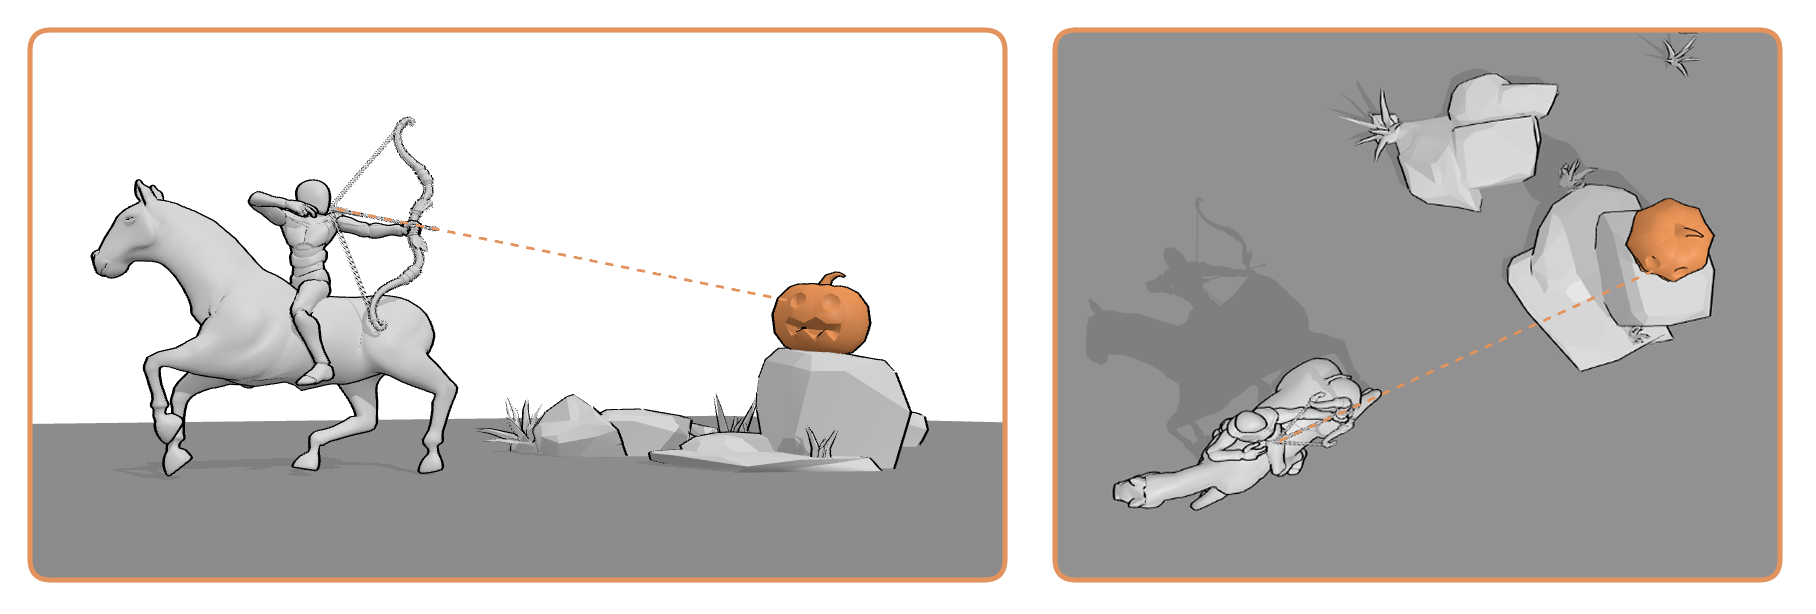
Before calling the pose finished, I like to check it from a distance. If I draw an imaginary line extending from the arrow, does it actually pass through the place the character is looking? Surprisingly often, the answer is no. A small rotation of the head, a slight adjustment to the bow, or changing the angle of the shoulders is sometimes all it takes to make the entire pose feel intentional.
Not Every Archer Should Stand the Same Way
It’s surprisingly easy to fall into the habit of drawing every archer with the same balanced, shoulder-width stance. While it’s a solid starting point, it doesn’t fit every character or every situation.
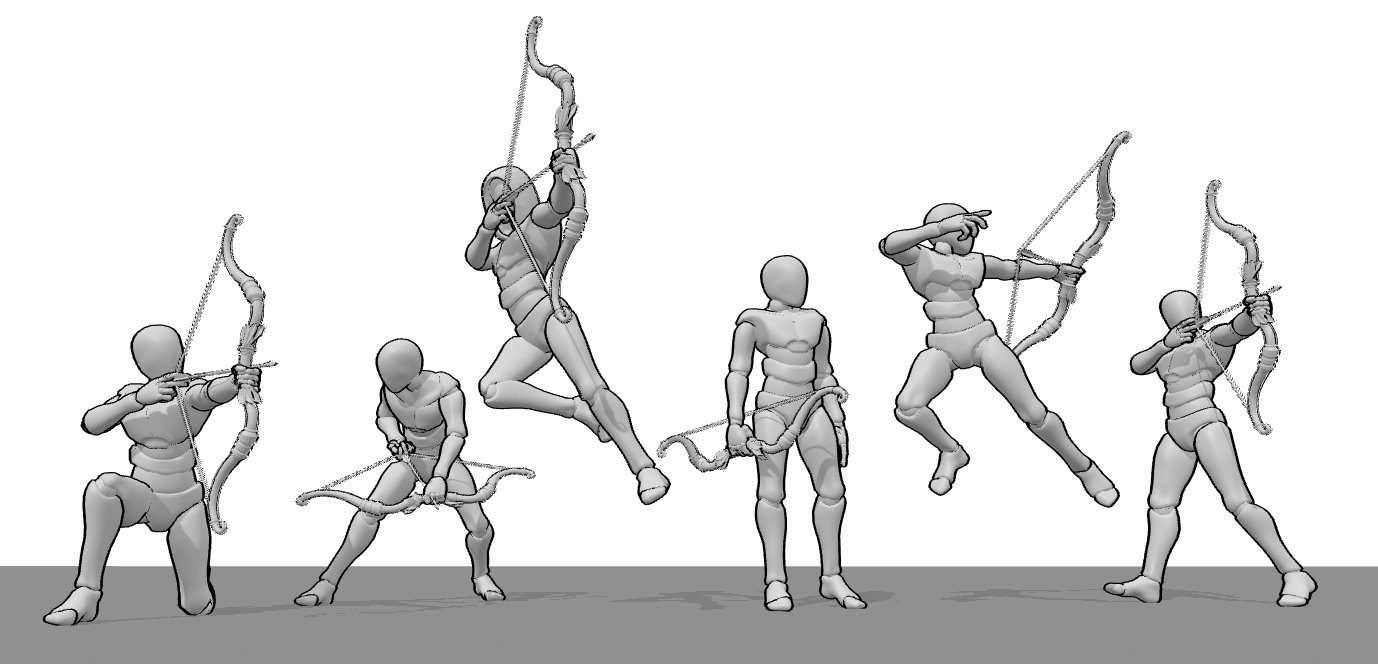
Think about who is holding the bow. A disciplined royal guard might stand with precise, controlled posture, while a hunter who spends every day moving through forests may naturally adopt a looser, more relaxed stance. A fantasy ranger balancing on a tree branch won’t distribute their weight the same way as a soldier standing on an open battlefield.
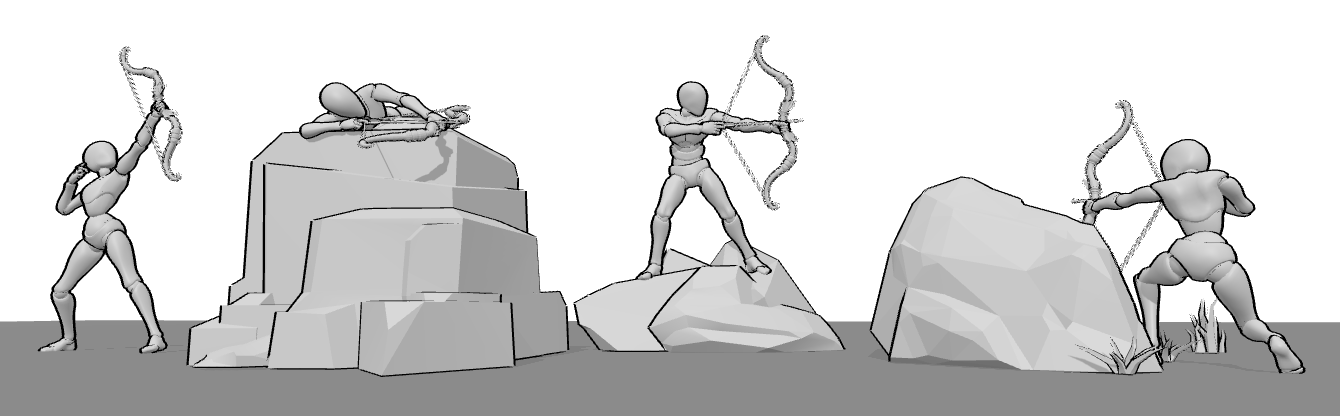
The environment matters just as much. Shooting uphill changes the angle of the torso. A character standing on rocks may place more weight on one leg. Mud, snow, or uneven ground all influence balance before the arrow is even released. These small adjustments make different archers feel like different people instead of the same pose wearing a different outfit.
When I need more variety, I don’t start by changing the arms. I change the character’s feet. A different stance naturally affects the hips, spine, shoulders, and eventually the entire pose, often with much less effort than trying to redesign the upper body alone.
Final Thoughts
Drawing convincing archery poses isn’t about memorizing a single stance or finding the “perfect” reference. It’s about understanding how the entire body works together to support the shot. Every small decision - from the character’s balance and torso rotation to the direction of their gaze - helps tell the viewer what is about to happen next.
The best way to improve is to explore plenty of variations. Try different stages of the shot, experiment with camera angles, and don’t be afraid to make small adjustments before committing to the final drawing. Sometimes moving a foot, rotating the torso a few degrees, or changing the bow angle creates a much stronger pose than completely starting over.