Drawing Feet From Any Angle With the Help of 3D References
If there is one body part artists love to avoid, it’s feet. I know this from experience, because I avoided them for years. Whenever a pose reached ankle level, my confidence dropped, my lines stiffened, and suddenly every foot looked broken or unfinished. What finally changed this was not memorizing more anatomy charts. It was switching to 3D references and using them deliberately.
Feet are difficult because they combine structure, perspective, weight and gesture all at once. They are rarely shown straight-on. Most of the time they are foreshortened, twisted, partially hidden, or under the full weight of the body. That makes guessing dangerous. And guessing is exactly what most artists do when drawing feet.
Why Drawing Feet Feels So Hard
Feet are often treated like an afterthought. For a long time, I treated them that way too. I focused on faces, hands, gesture, anatomy landmarks - and when it came to feet, I rushed them or hid them. Not because I didn’t care, but because I didn’t fully understand them.
Feet are structurally complex and visually unforgiving. They are a mix of rigid and flexible forms working together under pressure. Unlike hands, which can float freely in space, feet are almost always interacting with gravity. They push, support, balance, stabilize and carry weight.
What makes drawing feet especially difficult is that they rarely appear in a neutral position. A small change in camera angle completely changes their shape. The heel suddenly dominates. The toes compress or fan out. The ankle bends in ways that are hard to invent convincingly.
Early on, I kept trying to solve this by memorizing anatomy diagrams. It helped a little, but not where it mattered most. The moment the foot rotated or the pose became dynamic, everything I had memorized fell apart. I realized the problem wasn’t lack of knowledge. It was lack of spatial understanding.
Why 3D References Are a Game Changer
With a 3D model, you can:
- rotate the foot freely
- study extreme foreshortening
- see how the ankle connects to the leg
- understand how weight affects shape
This is especially powerful when drawing feet from unusual angles. Top-down. Low camera. Back view. Twisted stances. All the angles that usually break drawings become manageable.
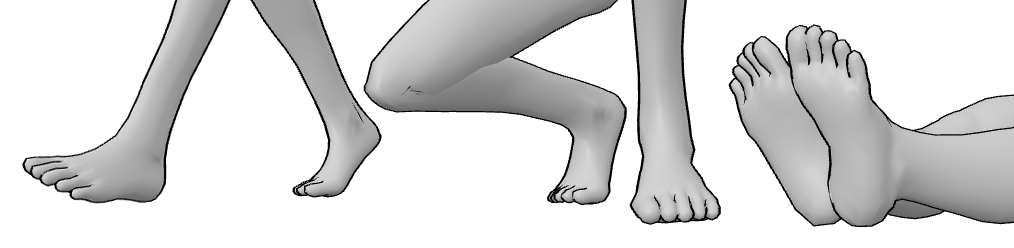
How 3D References Help You Understand Structure
When you rotate a 3D model, patterns start to appear. You notice that the heel behaves like a solid block. The arch creates a clear rhythm. Instead of memorizing names of bones, you learn visually. You see how forms overlap. This kind of understanding sticks far better than flat diagrams.
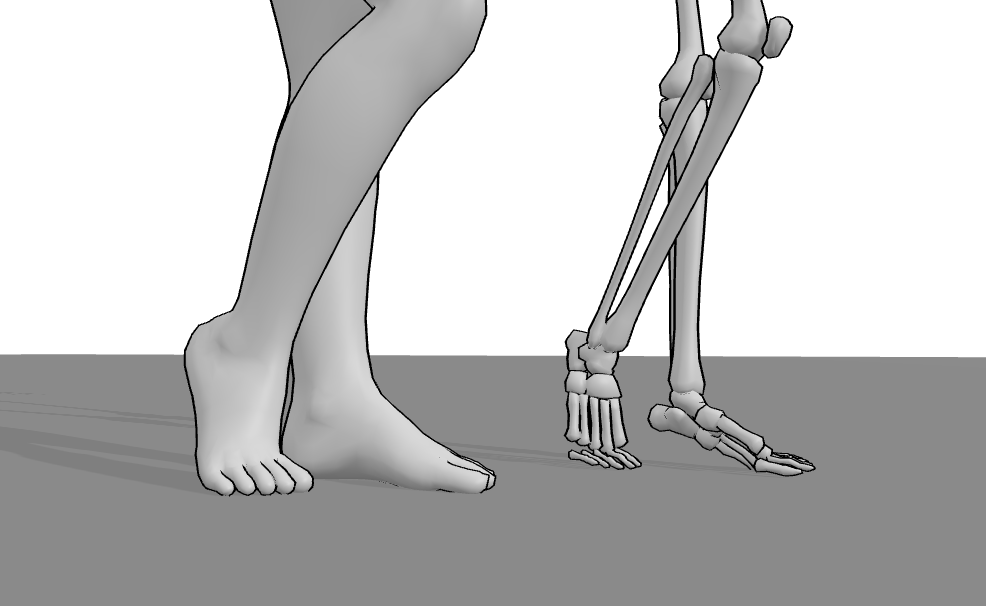
One more advantage is that in PoseMyArt you can switch to skeleton model and study the foot purely as a structural system.
Seeing the bones directly helps you understand why certain planes break, where weight is supported, and how the arch actually functions in space.
This makes it much easier to connect surface forms to the underlying anatomy without overthinking terminology.
Drawing Feet From Any Angle Without Fear
The biggest benefit of 3D references is confidence. Once you know you can always check the angle, fear disappears. You stop avoiding feet in compositions. You stop cropping characters at the ankles.
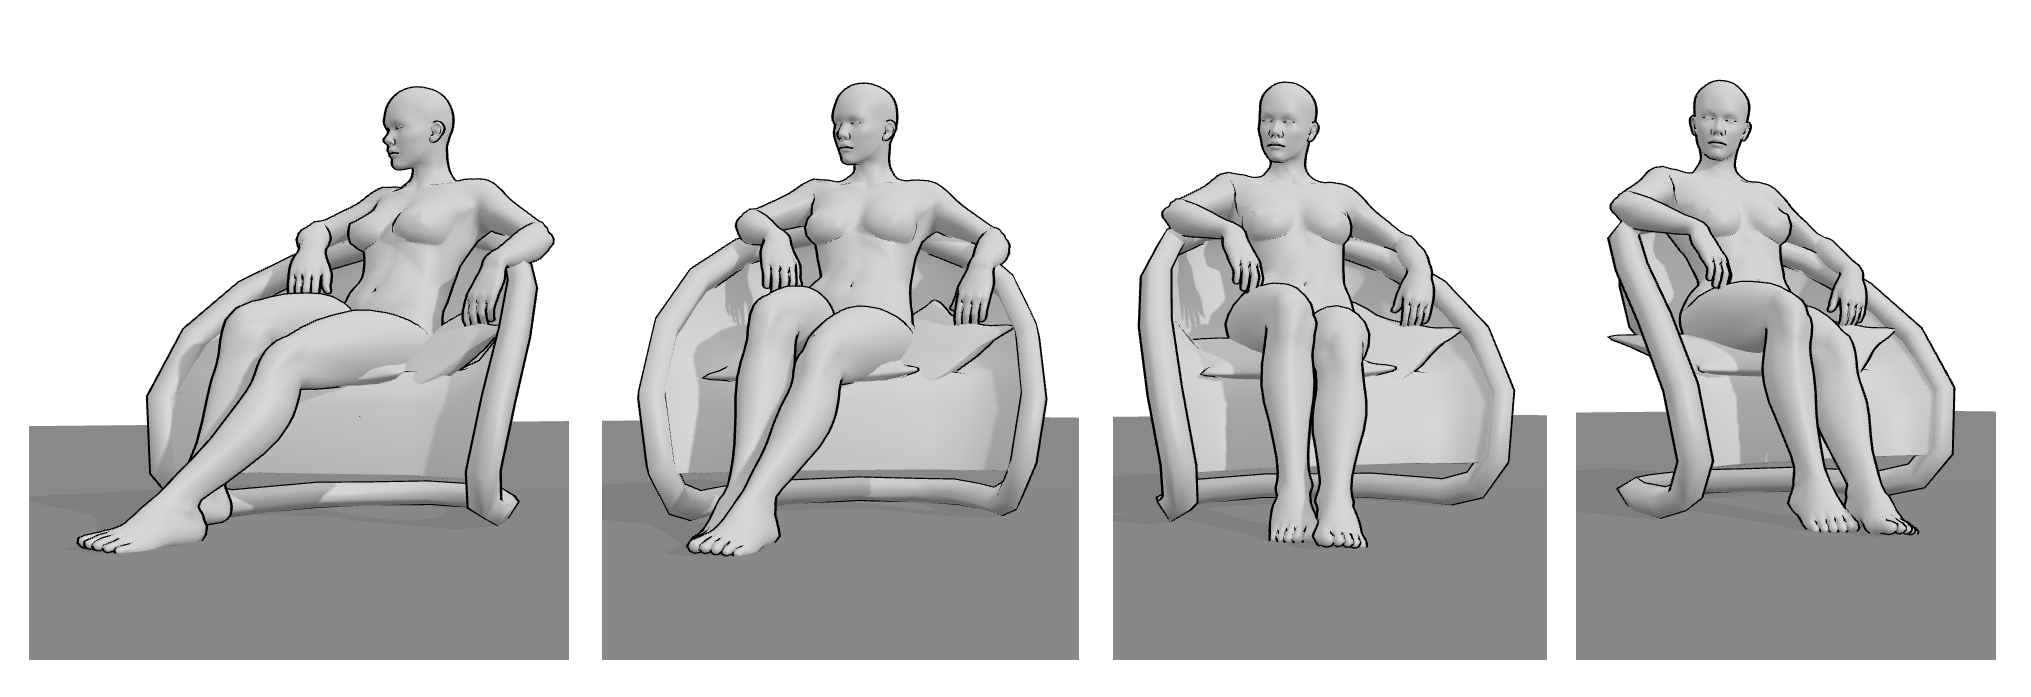
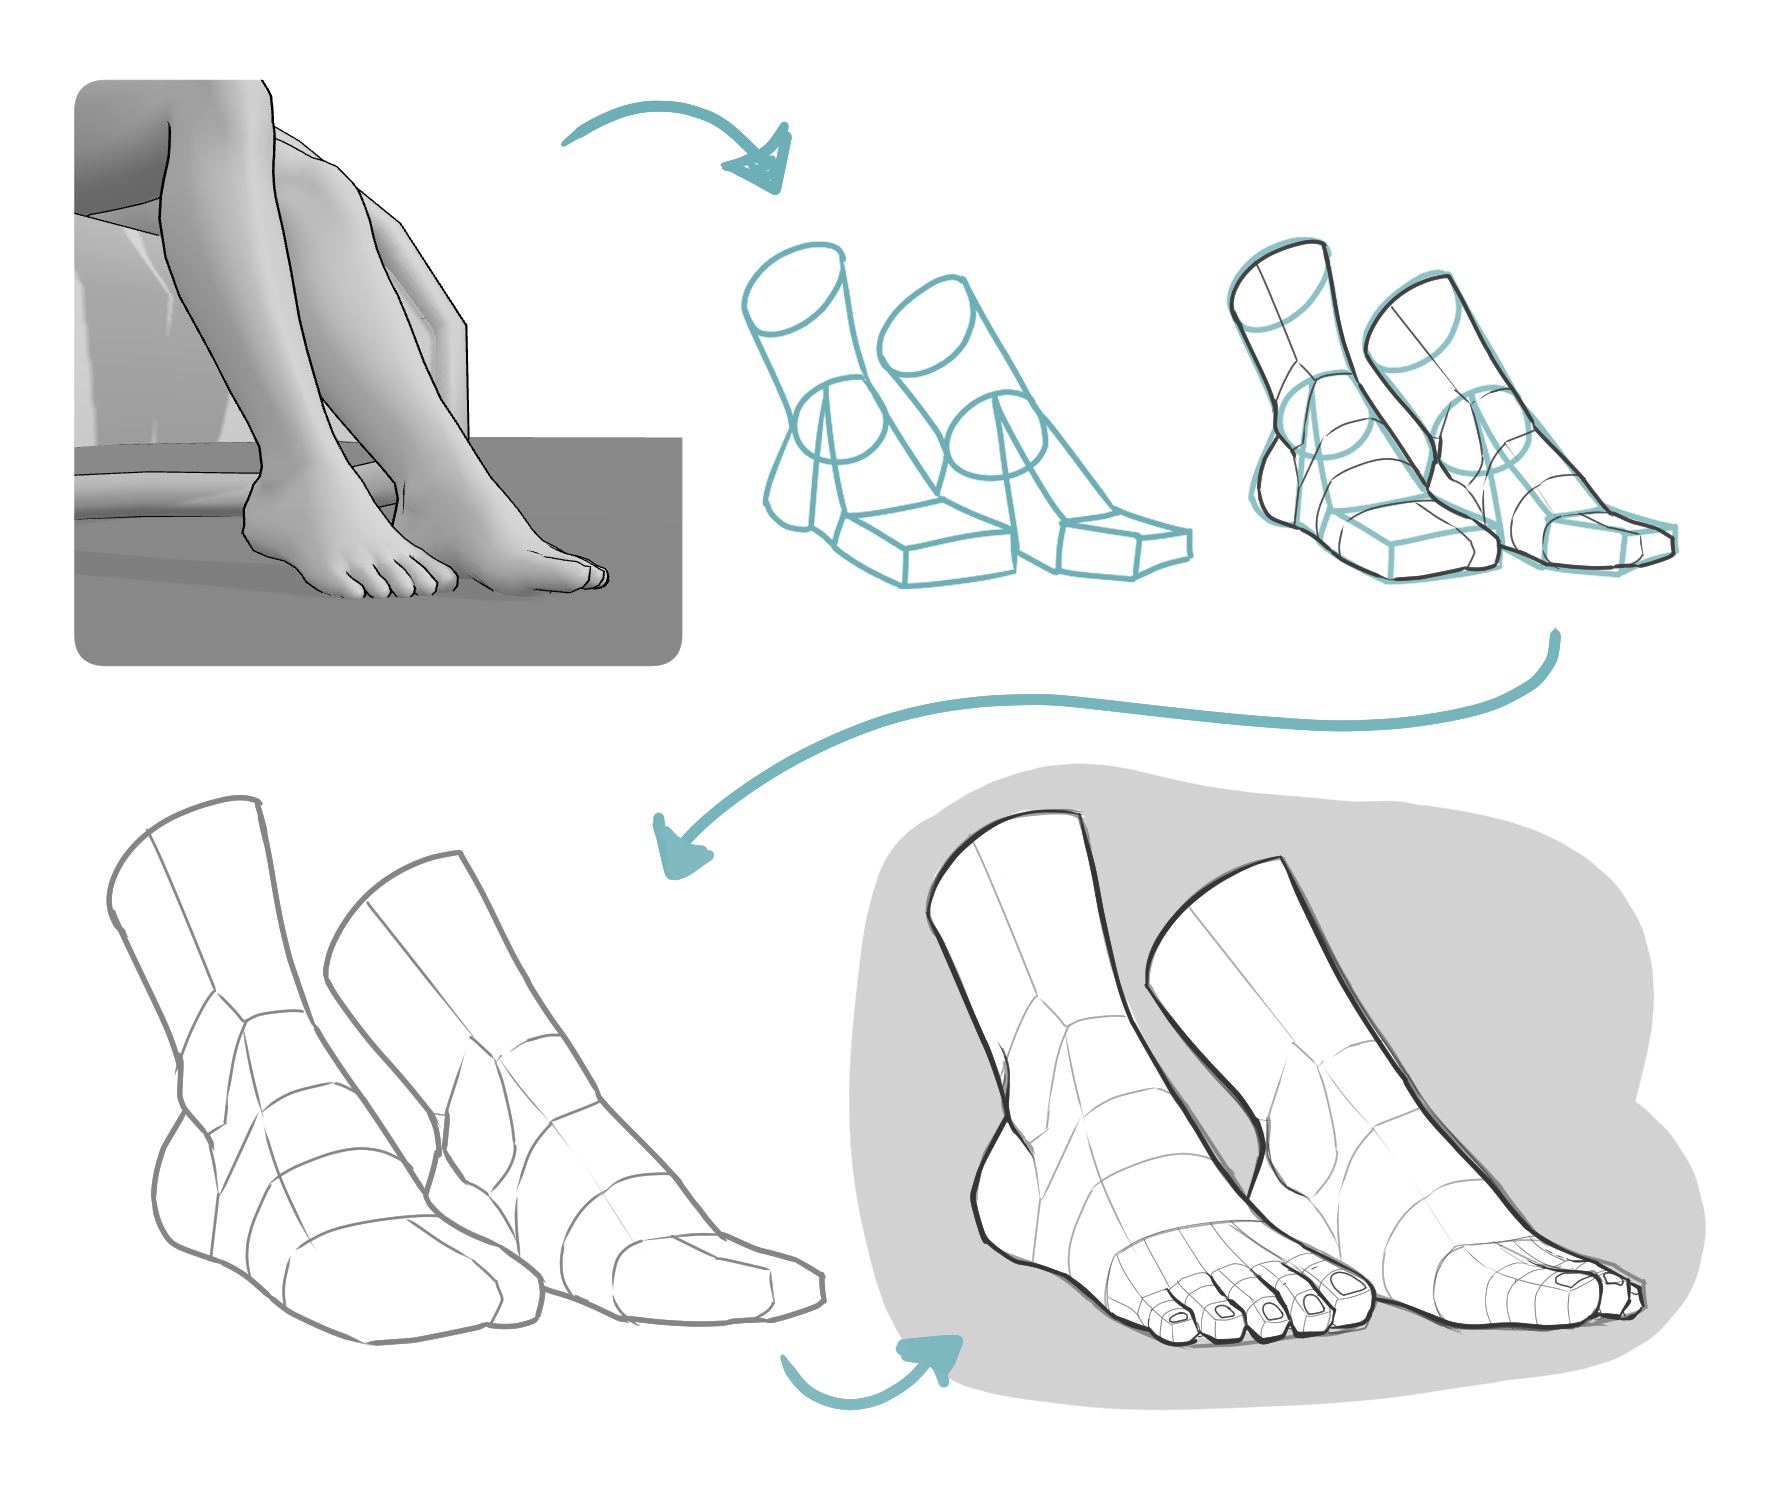
A practical workflow looks like this: First, choose your full-body pose. Then isolate the foot and adjust the camera to a suitable angle. Do quick sketches focusing only on the big shapes. Only after that do you refine toes and details.
How This Improves Your Entire Figure Drawing
Feet affect more than just feet. When they are correct, the body feels heavier. More stable. More real.
Using 3D references for feet also improves:
- balance in standing poses
- realism in walking and running
- clarity in action scenes
- consistency across multiple views
It trains your eye to think in space.
Don’t limit foot studies to neutral standing poses. The real breakthrough comes when you study feet in motion and under load. Pushing, jumping, and leaning reveal how weight, tension, and contact with the ground actually work.
Practical Foot Drawing Tips That Actually Work
Once you stop guessing and start observing, foot anatomy becomes far less intimidating. The key is not to draw details first, but to build the foot the same way it functions in reality: as a weight-bearing structure.
Step 1: Block the Foot as Simple Forms
Before thinking about toes or tendons, reduce the foot to three main masses:
- a solid heel block
- a wedge-shaped midfoot (the arch)
- a flexible toe block
Think of the heel as a box, not a curve. It is the anchor point.
The midfoot connects that block to the toes with a slight twist, not a straight line.
When using 3D references, rotate the foot and sketch only these three shapes from multiple angles. This trains spatial understanding faster than any anatomy chart.
Step 2: Understand the Foot’s Asymmetry
A common beginner mistake is drawing feet too symmetrical. Real feet are not.
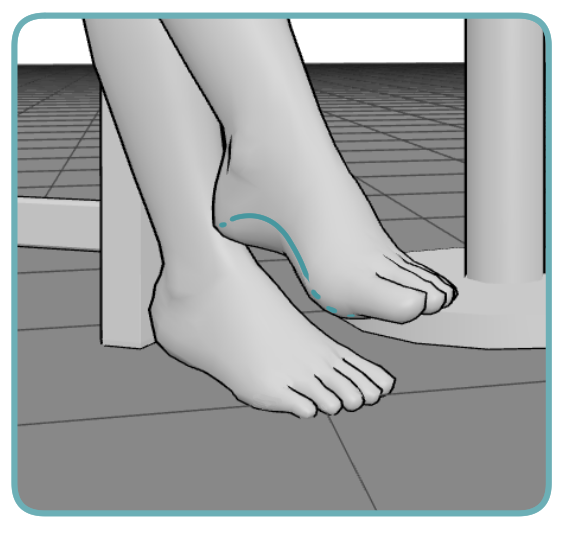
The inner arch is higher and lighter - The inner side of the foot lifts away from the ground. Less weight rests here, so in drawing this side should feel more open, curved, and less compressed.
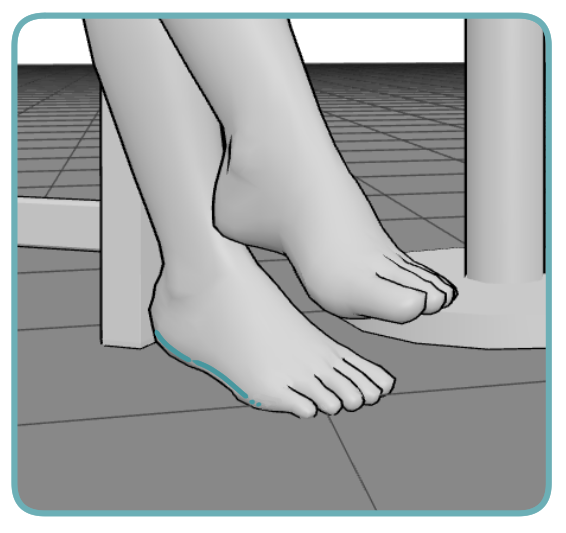
The outer edge is straighter and more grounded - The outer side of the foot carries more weight. This makes the edge feel firmer, straighter, and more connected to the ground. When both sides are drawn the same, the foot tends to look flat and unstable.
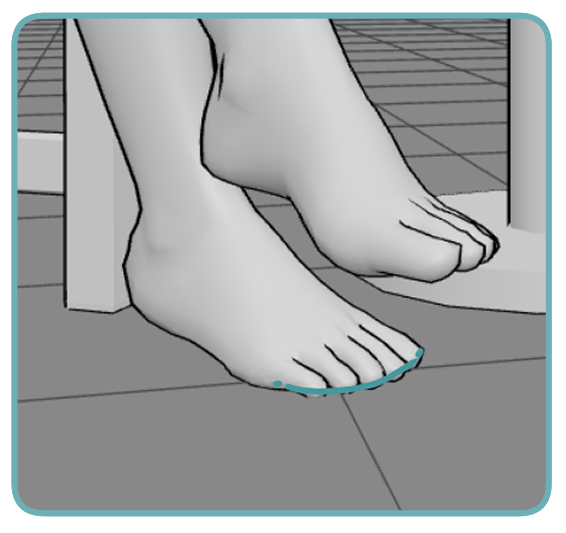
Toes are arranged in a diagonal rhythm, not a straight row - The big toe usually sits farther forward, with the smaller toes stepping back gradually. This creates a natural diagonal flow. Once you recognize this, you stop flattening the toes into a single straight line.
Step 3: Draw Weight Before Detail
Always ask one question first: where is the weight going?
If the foot carries weight:
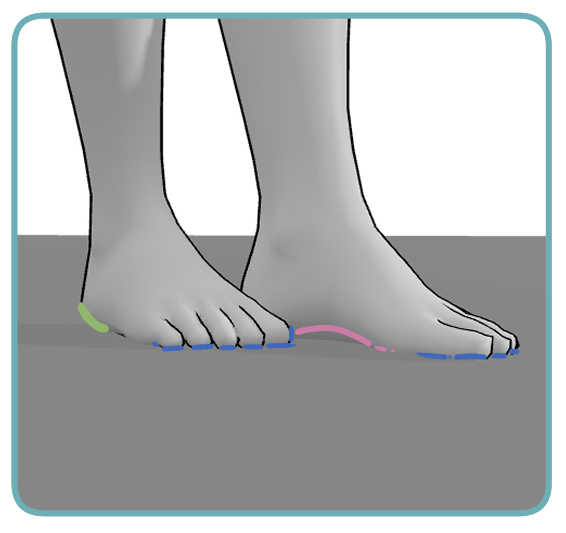
- the heel presses down
- the arch lowers slightly
- the toes may compress or spread
If the foot is relaxed or lifted:
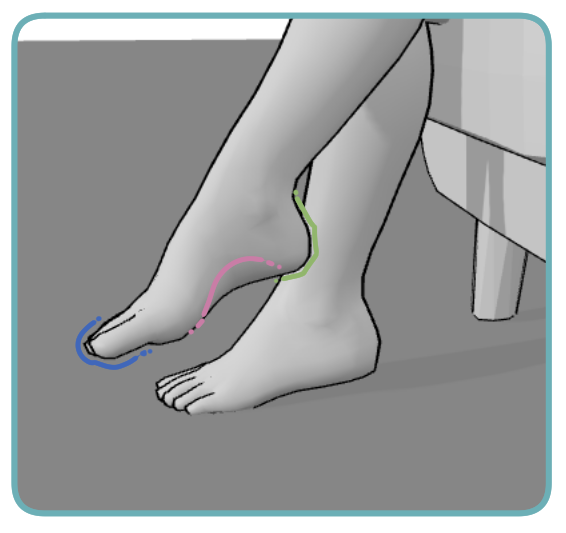
- the arch lifts
- the toes curve naturally
- the ankle angle opens
Step 4: Place the Ankle Correctly
The ankle is rarely centered.
The outer ankle bone sits lower and farther back than the inner one.
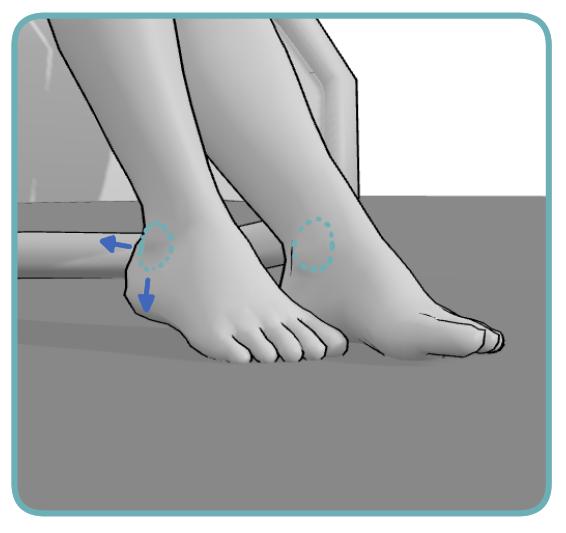
This detail alone fixes many “broken-looking” feet.
Step 5: Toes as a Group, Not Individuals
Do not draw toes one by one at first. Treat them as a single mass with a shared gesture.
Only after the overall rhythm works should you separate them slightly.
A useful exercise:
- draw the foot without toes
- add them as one shape
- then hint at separation with minimal lines
This keeps feet from looking stiff or overworked.
Using 3D References for Targeted Foot Studies
Instead of random practice, use focused mini-studies:
- 10 sketches of feet from extreme low angles
- 10 sketches of weight-shifted standing feet
- 10 sketches of feet mid-step
In PoseMyArt, you can lock the body pose and only rotate the camera around the foot. This isolates the area of focus without losing full-body context.
Over time, these studies build a reliable internal model. You begin to predict how the foot should look before checking reference. That is real progress.
Why This Approach Builds Long-Term Skill
Anatomy knowledge matters, but spatial clarity matters more.
3D references bridge that gap.
They don’t replace drawing fundamentals.
They remove uncertainty, speed up learning, and let you practice intelligently.
Once you stop fearing feet, your compositions open up.
Your figures feel grounded.
And one of the most avoided body parts becomes a quiet strength in your drawings.
Using PoseMyArt for Foot Studies
In PoseMyArt, you can position full-body 3D models and adjust camera angles precisely. This means you are not studying feet only in isolation, but always in relation to the entire pose. That context matters.
You can test how a foot looks when all the weight is on one leg. You can study pushing, jumping, leaning, or unstable stances. These are situations where feet matter most.
Over time, you build an internal library of angles and shapes. Eventually, you will rely less on references. Until then, 3D helps you check proportions, balance and weight distribution instead of guessing.
Final Thoughts
Drawing feet from any angle is not about talent. It is about removing uncertainty. 3D references do exactly that. If feet are still the part you dread most, don’t avoid them! Face them with better tools. Use 3D, rotate the model, draw what you see.
That is how feet stop being a weakness and start becoming a strength.