Mastering Arm Anatomy: How 3D Pose References Help You Draw Arms Correctly
For a long time, arms were the part I dreaded drawing the most. Not hands - arms. Hands get all the attention, but arms are where drawings quietly fall apart. Too stiff. Too thin. Too noodle-like. Or worse: they look fine… until the pose moves, twists, or reaches for something.
What I eventually realized is this: arms are not shapes - they’re systems.
They rotate, overlap, compress, stretch, and react to force. And if you try to invent all of that from memory every time, you’re setting yourself up for frustration.
That’s where 3D pose references helped me the most - they allowed me to see arms as real three-dimensional structures, understand how they move in space, and finally make sense of how everything connects and rotates.
A problem I kept running into was that my arms only looked correct in static poses. The moment the arm started reaching, lifting, or interacting with something, everything broke. The proportions didn’t feel wrong at first glance, but the motion never convinced me. It always felt like the arm was drawn after the action, instead of through it.
Why Arms Are Harder Than They Look
An arm seems simple on paper: upper arm, forearm, hand.
In reality, it’s one of the most mechanically complex structures in the body.
You’re dealing with:
-
multiple joints working together
-
muscles wrapping around a rotating bone system
-
constant perspective shifts
-
interaction with objects, weight, or resistance
Most drawing mistakes come from guessing how the arm behaves in space.
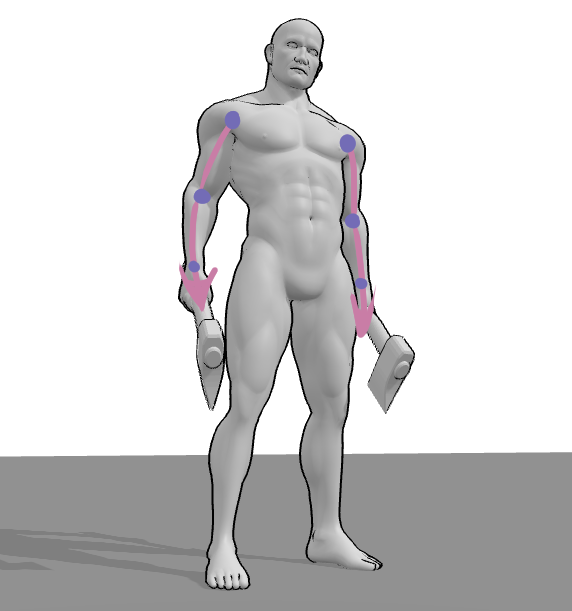
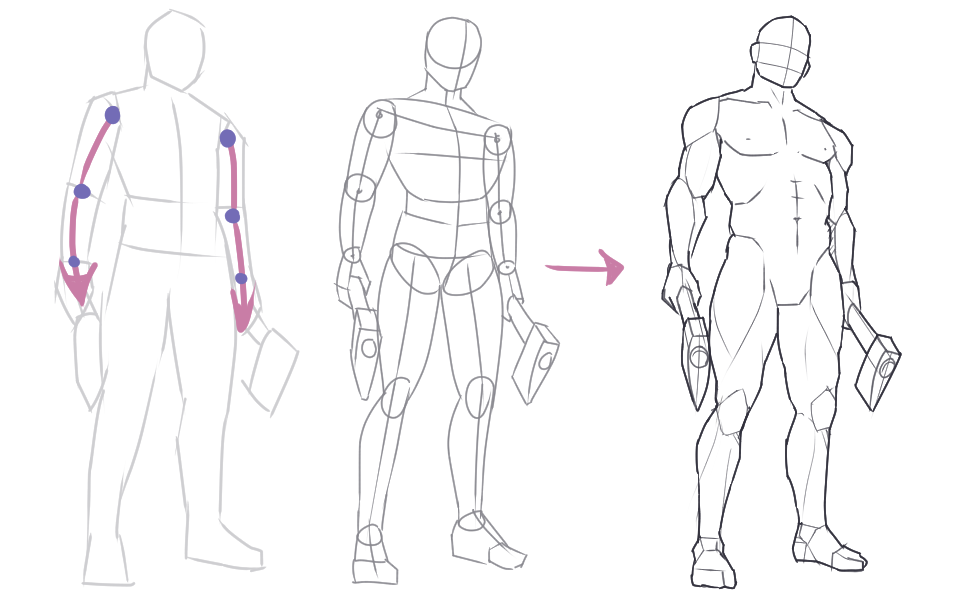
Think in Movement, Not Outlines
One of the biggest breakthroughs for me was stopping the habit of outlining arms too early.
Arms don’t exist as flat silhouettes. They exist as direction, tension and rotation first - shape comes later.
When you use a 3D pose reference, you immediately see:
-
where the upper arm is rotating from the shoulder
-
how the forearm twists independently
-
how the elbow changes orientation depending on the pose
This is especially visible when the arm is raised, pushing, pulling, or holding something.
Instead of asking “How do I draw this arm?”, the question becomes:
“What is this arm doing?”
That mental shift matters.
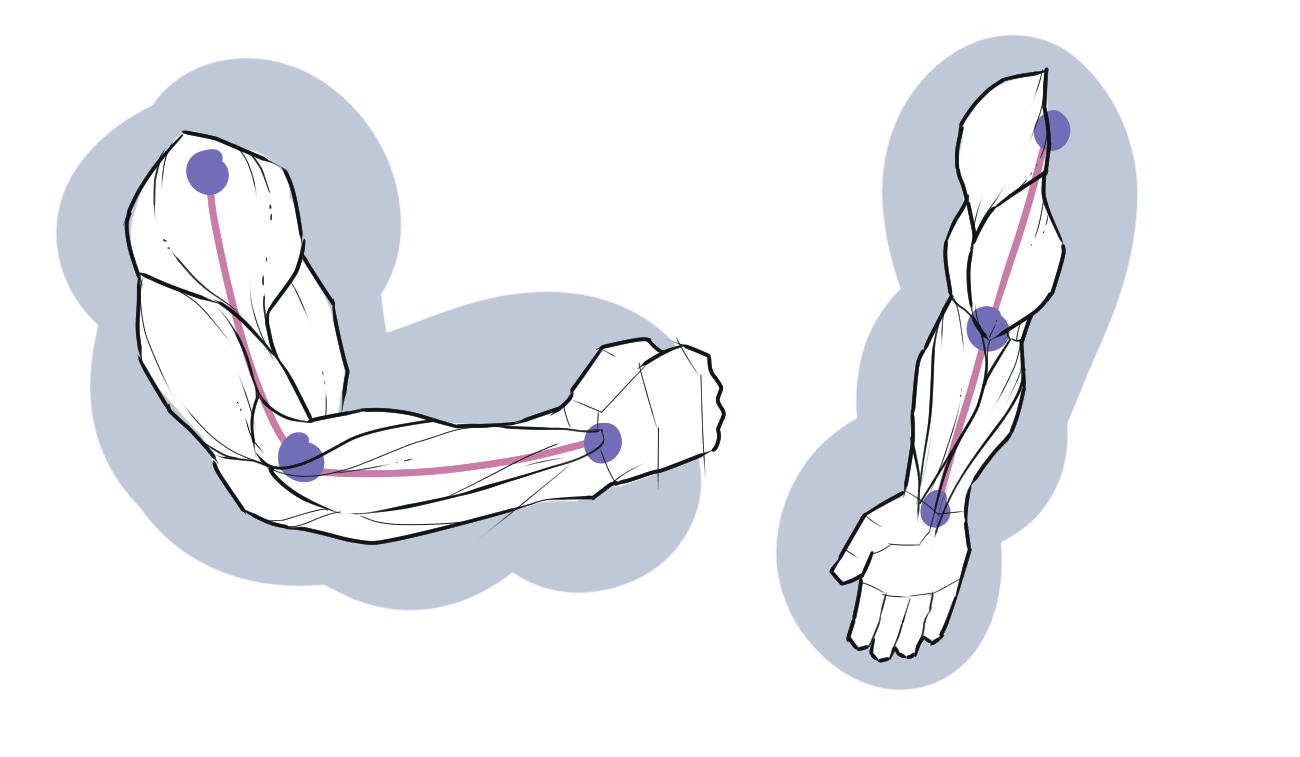
The Main Muscle Groups You Actually Need to Understand
You don’t need to memorize every muscle to draw arms well. But you do need to understand the major masses and how they interact.
Upper Arm
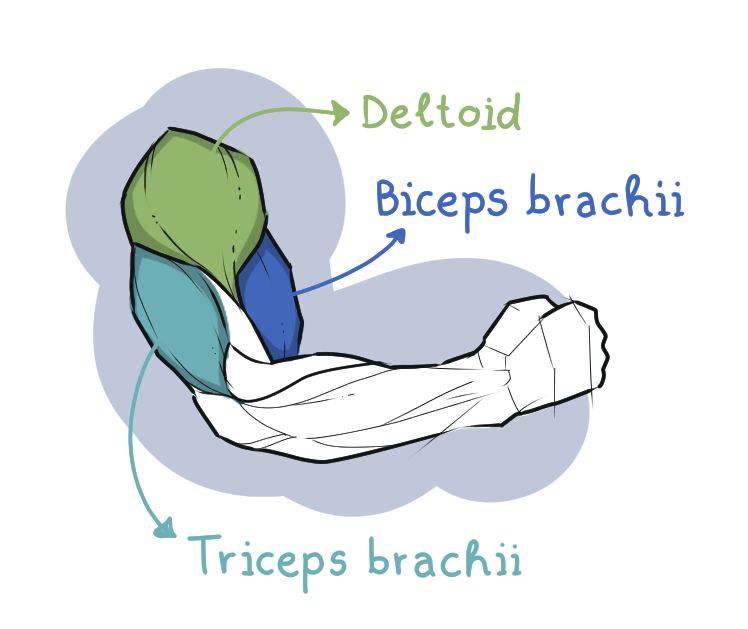
-
Deltoid – shoulder cap that connects the arm to the torso, defines the upper arm silhouette and affects how the arm lifts and rotates
-
Biceps brachii – front mass, most visible during flexion and pulling actions
-
Triceps brachii – back mass, dominant in extension and pushing movements
In relaxed poses, the triceps usually define the silhouette more than the biceps - something many artists underestimate.
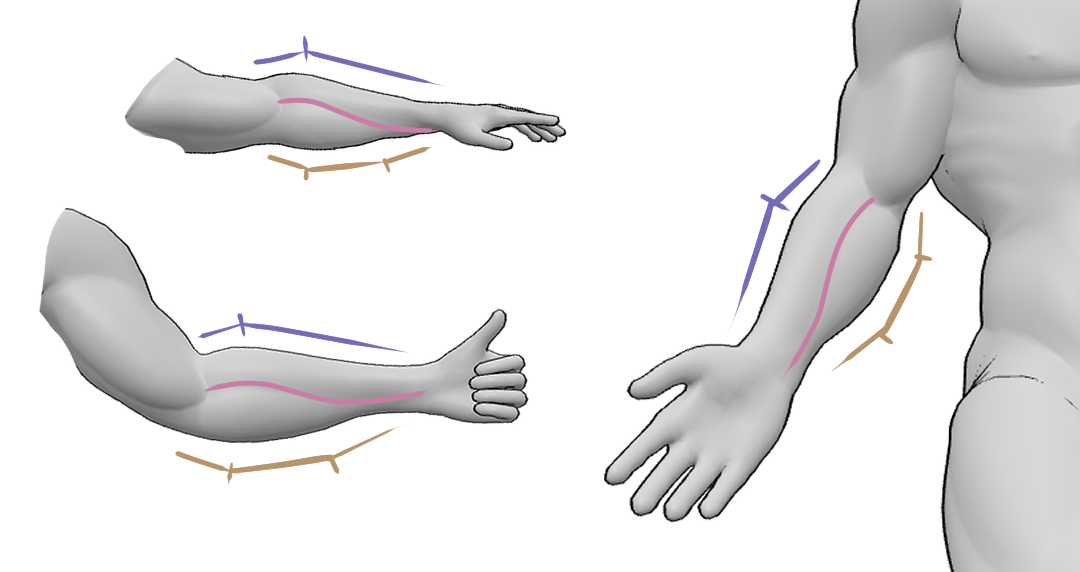
Forearm
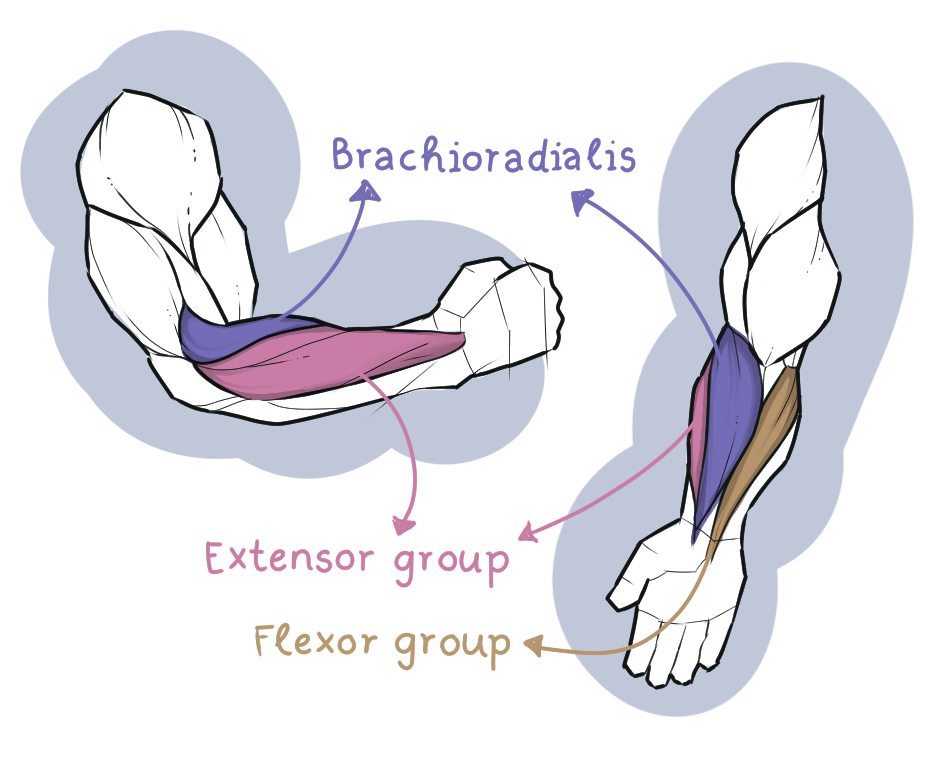
This is where things usually fall apart.
-
Brachioradialis - the key bridge between upper arm and forearm
-
Flexor group - inner forearm, gripping and holding
-
Extensor group - outer forearm, opening and releasing
The forearm is not symmetrical.
Using 3D references makes this immediately obvious, especially when the wrist rotates.
Wrists and Forearms: The Silent Problem Area
Most arm drawings don’t fail at the shoulder.
They fail quietly at the wrist.
A common mistake I see (and made myself) is treating the wrist like a simple hinge. It’s not. The wrist is a transition zone where rotation, angle and tension all meet.
3D pose references make this easier to grasp because you can clearly observe:
-
how the forearm narrows into the wrist
-
how small angle changes affect the overall flow of the arm
-
how the hand’s position influences the rhythm and balance of the entire limb
Once you start paying attention to this area, even subtle adjustments can make an arm feel grounded, connected, and believable instead of stiff or detached.
The same issue appears even more clearly when the arm interacts with an object. A slight change in grip or pressure completely shifts the flow of the forearm. What used to feel like a minor adjustment suddenly affects the entire pose. This is often the moment where a drawing either starts to feel grounded - or starts to fall apart.
Why 3D Pose References Actually Help You Learn
3D pose references don’t remove thinking - they redirect it.
Instead of reconstructing anatomy from imagination, you start with a fully structured arm in space. You see how the muscles sit, how the joints align, and how the form behaves from different camera angles.
What changes is your role as the artist.
Instead of relying on memory, you’re finally responding to something concrete in front of you. The guesswork disappears, and your decisions become intentional.
That makes corrections faster, practice more focused, and mistakes easier to spot before they become habits.
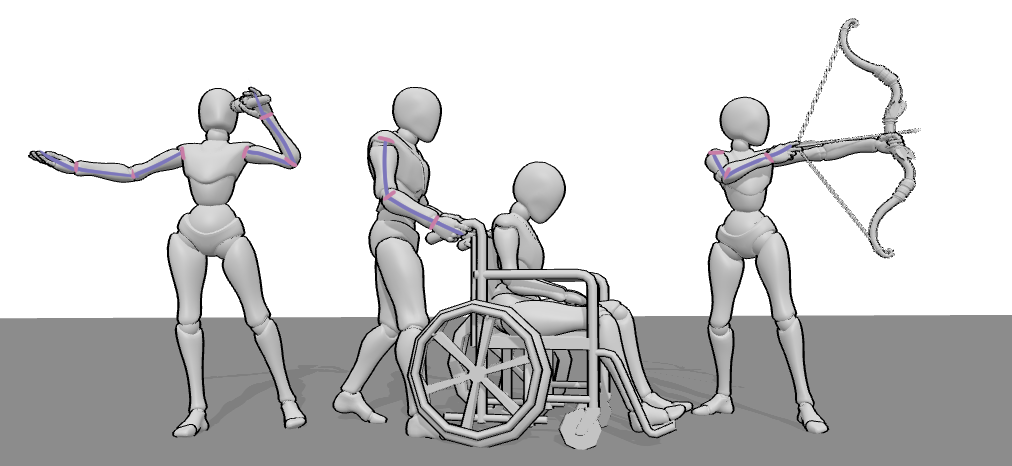
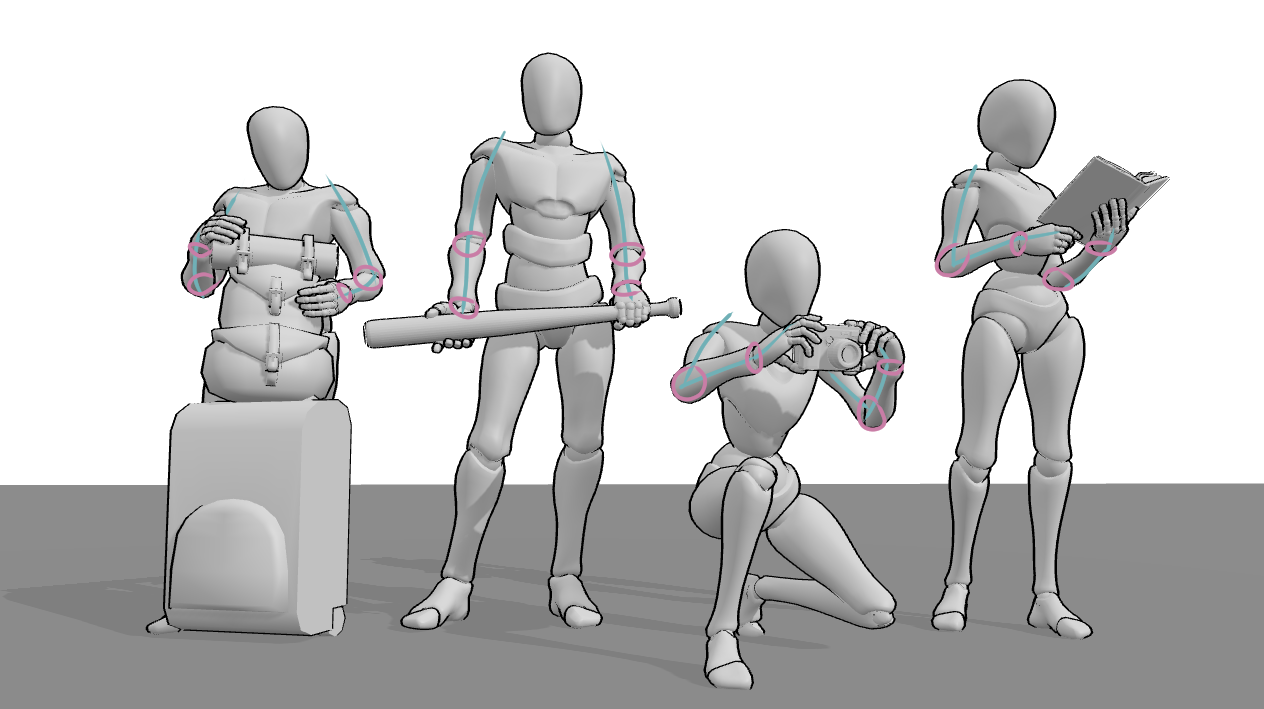
Using 3D Poses for Arm Practice
Here’s a simple but powerful way to practice arms with 3D poses:
-
Choose a pose with a clear arm action (lifting, holding, reaching)
-
Study the arm direction and rotation before drawing
-
Block in only the major masses first
-
Add muscle definition last - not first
Switch the camera angle.
Rotate the arm slightly.
Observe how everything changes.
That repetition builds understanding faster than copying a single image ever will.
Why Pose Variety Matters
One of the biggest advantages of using PoseMyArt is access to a wide variety of different poses and models.
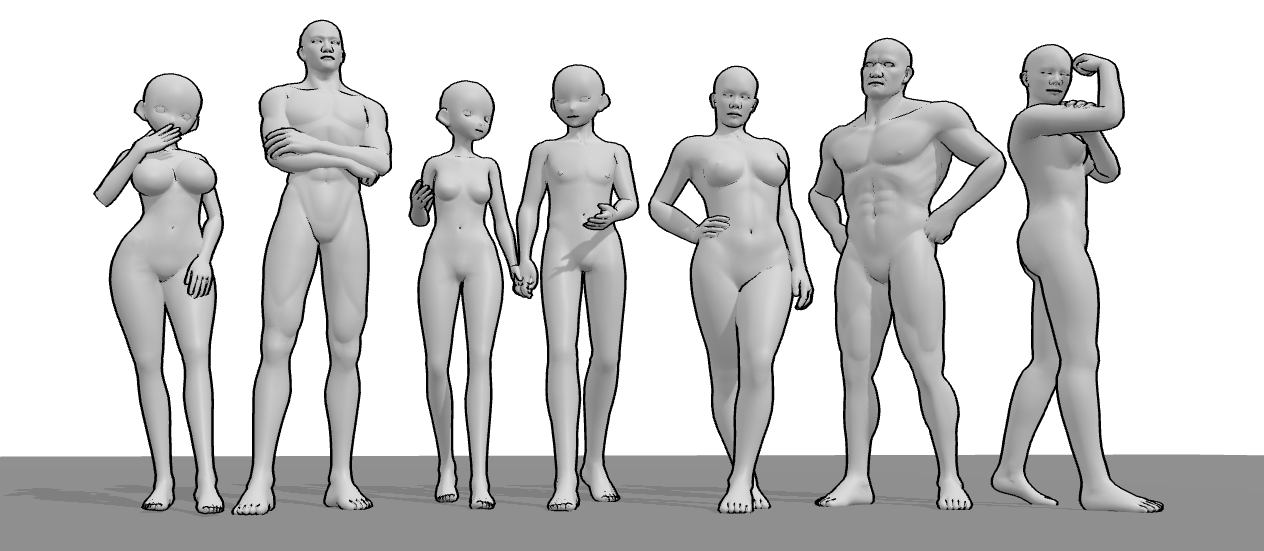
Different body types, different arm thicknesses, different muscle definitions.
Arms on a slim body behave differently than on a muscular one. But the structure still follows the same rules.
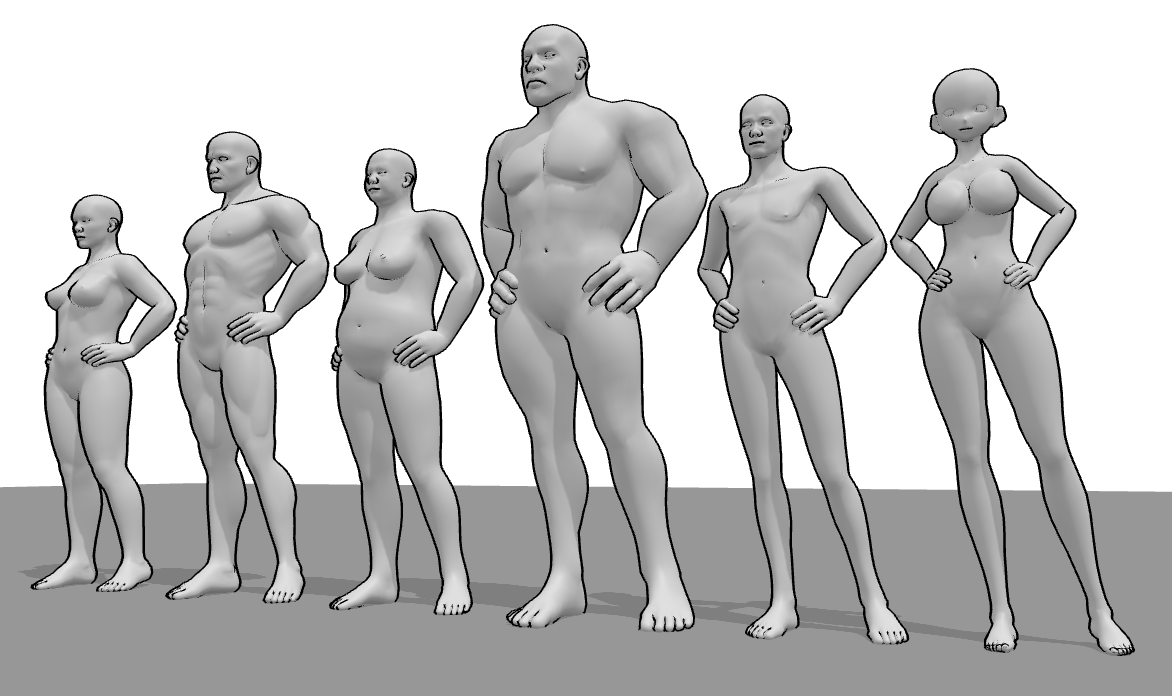
Seeing that consistency across variation is how anatomy finally clicks.
With PoseMyArt references you’re not locked into a single viewpoint.
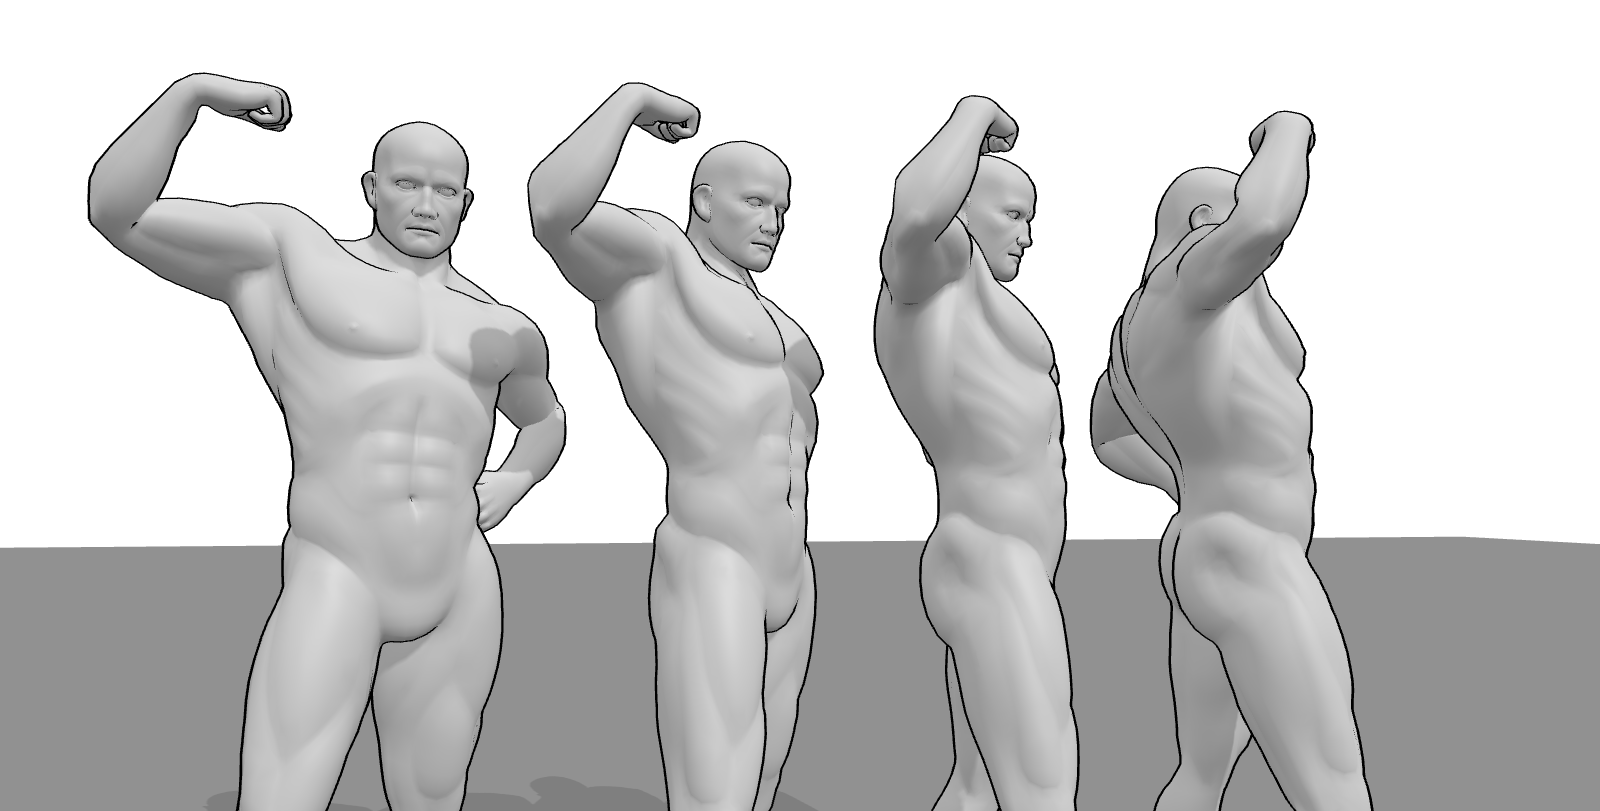
Every pose can be rotated freely - analyzed, examined from any angle and any distance. This makes it much easier to understand shoulder rotation, elbow placement and foreshortening in real space.
Lighting control adds another layer of clarity.

By changing the light direction, you can study how the arms’ form, volume, and muscle separation read under different conditions.
And if you want full control, you can create your own poses from scratch or choose from thousands of premade scenes.
Final Thoughts
Good arm drawing isn’t about perfect muscles. It’s about clarity, structure and believable movement.
3D pose references don’t replace skill - they build it. They give you a stable foundation so you can focus on decision-making instead of guesswork.
If arms have been a weak point in your drawings, don’t avoid them.
Study them in motion.
Rotate them.
Break them down.
And let structure do the heavy lifting - so your drawings don’t have to.